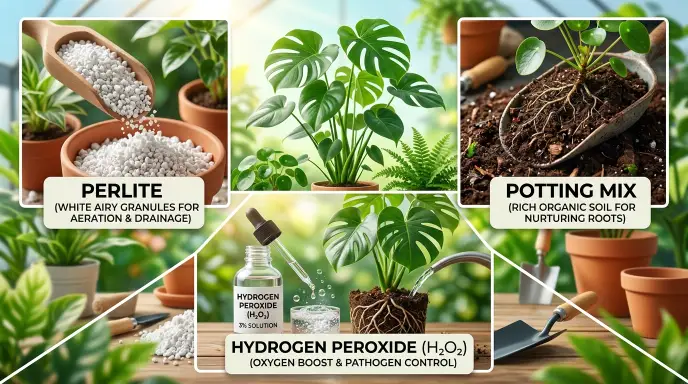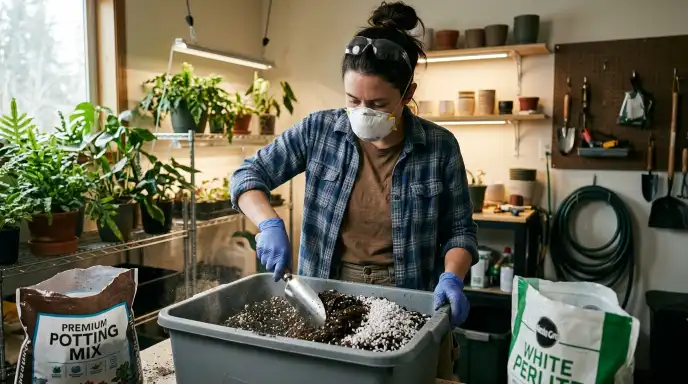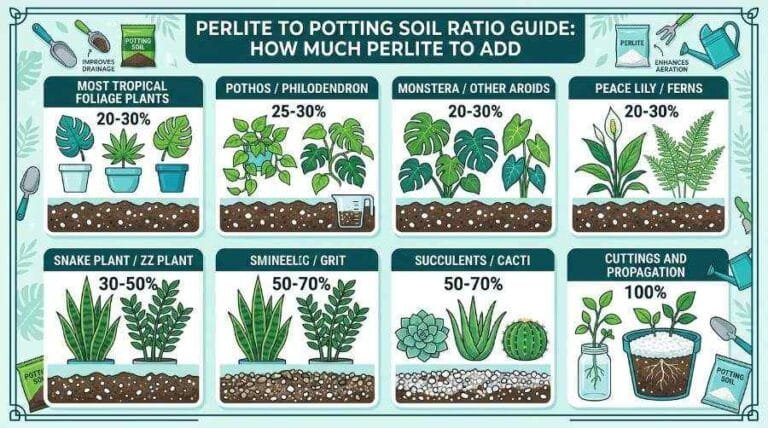
Measure your potting mix and perlite separately by volume, using the plant-specific range in the table below as your starting point, combine them in a container outside the pot, and mix until the perlite is spread evenly rather than clumped in one spot. Pot up, water thoroughly, then watch how the mix drains over the next few days before deciding if the ratio needs adjusting.
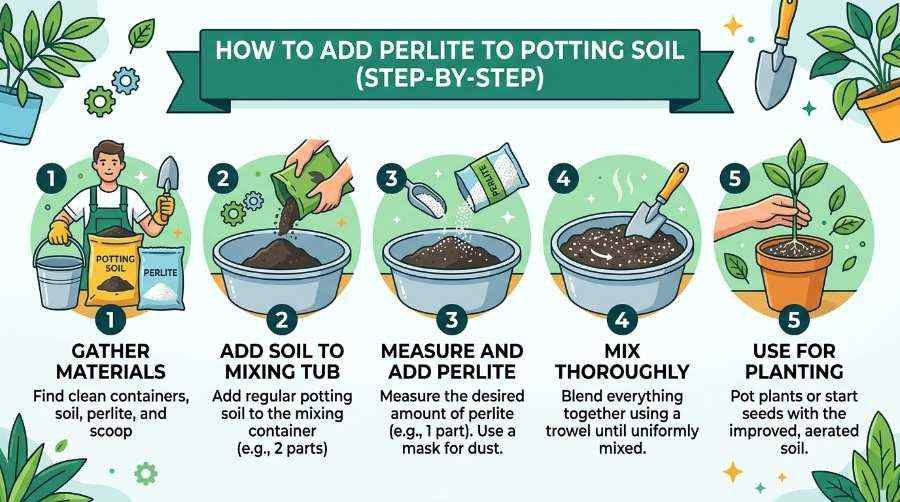
If your potting soil stays wet for days, feels compacted, or lets water pool on the surface instead of soaking in, perlite can fix the physical structure of the mix. But dumping a handful into the pot and calling it done usually backfires. Learn how perlite prevents root rot in this guide. How you measure it, mix it, and test it matters just as much as how much you use. Read this guide to learn how to handle perlite safely.
This guide walks through the actual process:
- How much perlite to add for your specific plant
- How to mix it correctly, step by step
- How to test whether you got the ratio right
- How to fix it if the mix isn’t behaving the way you expected
Learn about the 6 best perlite potting mixes from this guide.
Quick Decision Tree: How Much Perlite Do I Need?
Before the full breakdown, here’s a fast way to land on a starting ratio. Follow the branches that match your plant and mix:
START HERE
  |
  v
Does your plant store water in thick leaves or stems?
(succulent, cactus, jade, aloe, etc.)
  |
  |-- YES --> Use 50-70% perlite
  |
  |-- NO --> Continue
              |
              v
      Does it grow from rhizomes and tolerate dry spells?
      (snake plant, ZZ plant)
              |
              |-- YES --> Use 30-50% perlite
              |
              |-- NO --> Continue
                          |
                          v
                  Is it an aroid that likes airflow at the roots?
                  (pothos, philodendron, monstera)
                          |
                          |-- YES --> Is it specifically pothos or philodendron?
                                      |
                                      |-- YES --> Use 25-30% perlite
                                      |
                                      |-- NO --> Use 20-30% perlite
                                                 (monstera and other aroids)
                          |
                          |-- NO --> Is it a cutting or fresh propagation?
                                     |
                                     |-- YES --> Use a higher percentage
                                                 than the mature plant would need
                                     |
                                     |-- NO --> Use 20-30% perlite
                                                (general tropical foliage,
                                                ferns, peace lily, etc.)
After the tree gives you a starting number, adjust up or down based on your existing mix, pot size, and how your home holds humidity. Treat the tree as a starting point, not a final answer.
How Much Perlite Should You Add to Potting Soil?
Here’s a starting point for the most common houseplant categories:
| Plant or Category | Starting Perlite Range | Main Goal |
|---|---|---|
| Most tropical foliage plants | 20–30% | Improve aeration |
| Pothos/philodendron | 25–30% | Balance moisture and air |
| Monstera / other aroids | 20–30% | Airier root zone |
| Peace lily / ferns | 20–30% | Retain more moisture |
| Snake plant / ZZ plant | 30–50% | Faster drainage |
| Succulents/cacti | 50–70% | Reduce prolonged wetness |
| Cuttings and propagation | Higher percentages | Air around developing roots |
A few things that push you toward the higher or lower end of each range:
- Low light in the room → dries slower → lean toward more perlite
- Bright light or a sunny windowsill → dries faster → you can use less
- Small pot → holds less total moisture → less perlite needed
- Large pot for the plant’s size → holds more moisture than the roots use → more perlite needed
- Already-chunky base mix → less added perlite required overall
These are starting ranges, not universal formulas. Your existing potting mix, the size of your pot, the specific plant, how often you water, and how much light and airflow your home gets can all shift the ideal amount up or down.
Pots are also an important part of indoor plant care. To learn more about choosing the best pots for your plants, read our latest guide
My own observation:
In my experience, two identical pothos cuttings planted in the same week and the same 28% perlite mix needed different watering schedules. One was placed on a bright windowsill, while the other stayed in a dim hallway. The ratio was correct for both plants, but the different environments affected how quickly the soil dried.
What You Need Before Mixing Perlite
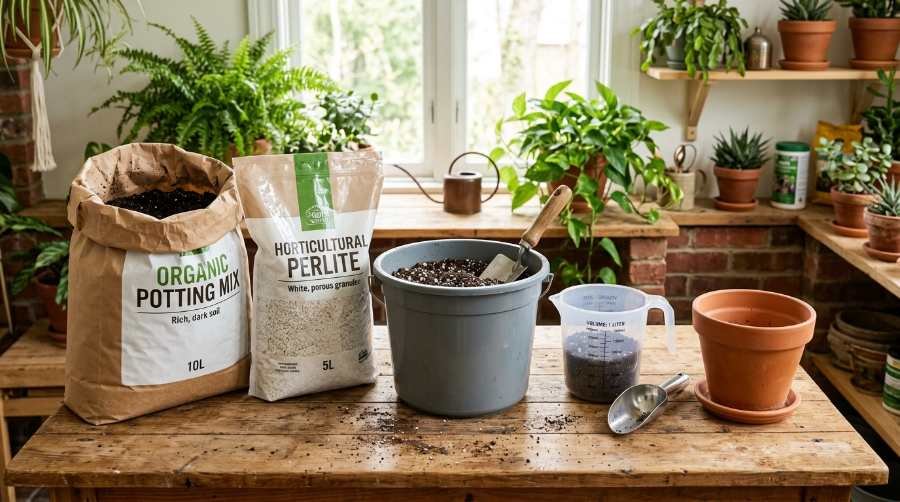
Materials checklist:
- Potting mix
- Horticultural perlite
- A bucket or tray for mixing
- Measuring cup (for volume, not weight)
- Trowel or scoop
- Plant pot with drainage holes
A quick safety note:
Dry perlite can release a little fine dust when you pour or mix it, especially when it’s fresh from a new bag. It’s a minor annoyance, not a reason to avoid perlite, and a few simple habits can help reduce the dust:
- Avoid breathing it in directly while pouring
- Work somewhere with decent airflow, near an open window or outdoors
- Lightly dampen the perlite with a spray bottle before mixing to keep dust down
Check Your Existing Potting Mix First
This step gets skipped constantly, and it’s probably the biggest reason “just add 30% perlite” advice doesn’t always work for everyone who tries it. If your plant is struggling even after fixing the soil, How to Diagnose Indoor Plant Problems helps you check for pests, diseases, and other hidden issues.
Before you add anything, run through this checklist on your current soil:
- Is the mix compact, or does it crumble easily when you squeeze it?
- Does it stay wet for several days after watering?
- Does water sit on the surface instead of soaking in within a few seconds?
- Does it already contain perlite, pumice, or bark?
- Does it dry out unusually fast already, even before adding anything?
Why this matters:
adding 30% perlite to a dense, peat-heavy mix behaves completely differently than adding 30% perlite to a mix that’s already chunky with bark and pumice.
| Starting Mix | Adding 30% Perlite Results In |
|---|---|
| Dense, peat-heavy, compacted | Noticeably improved drainage and airflow |
| Already chunky (bark, pumice, coir mixed in) | Mix may become too loose to hold moisture at all |
| Already sandy or mineral-based | Minimal additional benefit, may need less than 30% |
Look at what you’re working with before you follow any ratio, including the one in the table above.
How to Calculate the Amount of Perlite
The formula is simple:
Perlite needed = target percentage × final mix volume
Here’s what that looks like for 1 liter of finished mix:
| Target % | Potting Mix | Perlite |
|---|---|---|
| 20% | 800 mL | 200 mL |
| 30% | 700 mL | 300 mL |
| 40% | 600 mL | 400 mL |
| 50% | 500 mL | 500 mL |
For a larger batch, say a 4-liter tub for repotting several plants at once, multiply straight across:
| Target % | Potting Mix | Perlite |
|---|---|---|
| 20% | 3,200 mL | 800 mL |
| 30% | 2,800 mL | 1,200 mL |
| 40% | 2,400 mL | 1,600 mL |
Measure by volume, not weight. Perlite is extremely light compared to potting soil, so weighing it out will throw your ratio off by a wide margin. A standard measuring cup works fine for small batches, and a large yogurt tub or similar container works well for bigger ones.
How to Add Perlite to Potting Soil: Step-by-Step
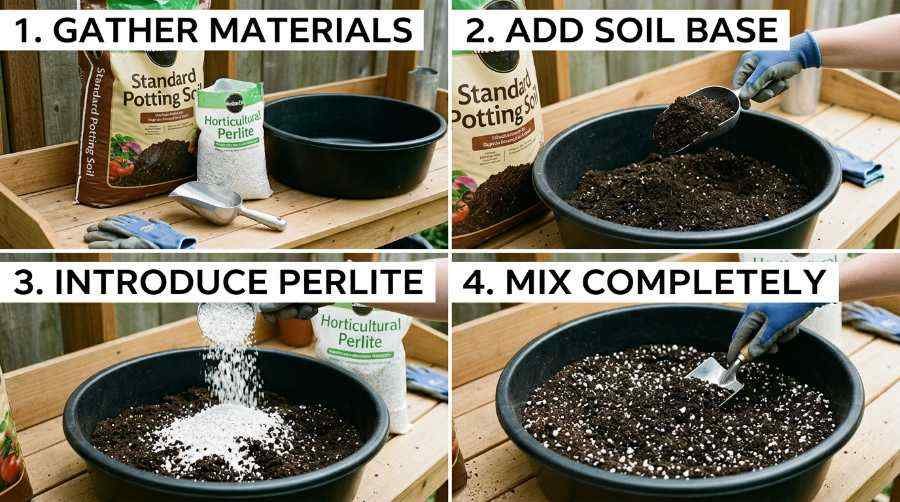
- Choose a large mixing container: Mix in a bucket, tray, or tarp outside the actual plant pot. Trying to mix perlite directly inside the pot almost always leaves pockets of unmixed soil at the bottom and sides.
- Measure your potting mix: Use the ratio you settled on for your specific plant, from the tables above.
- Measure the perlite: Use a separate measuring container so you’re not eyeballing it.
- Combine the ingredients: Add both the potting mix and the perlite to your mixing container.
- Mix thoroughly: Turn the mixture over with your hands or a trowel until the perlite is spread evenly throughout, not clumped in one section. Learn details about perlite dust inhalation risks in this guide.
- Check the texture: Grab a handful from a few different spots in the container and compare them. They should look and feel roughly the same.
- Prepare the pot: Confirm your container has drainage holes. Perlite improves aeration, but it can’t compensate for a pot with nowhere for excess water to go.
- Repot the plant: Place the root ball in the pot and fill in around it with your mixed soil. Firm it gently, just enough to remove large air pockets, without compacting it tightly.
- Water thoroughly: Water until it runs through the drainage holes. This settles the soil around the roots and shows you how the mix is behaving right away.
- Observe the drainage over the following days: Don’t stop at “water drained out the bottom.” Watch how the whole mix behaves over the next few days, not just the first few minutes.
Example:
for a 6-inch pot repotting a pothos, that usually works out to roughly 1.5 liters of finished mix. At a 25% ratio, that’s about 1,125 mL of potting soil to 375 mL of perlite, close enough to eyeball as three parts soil to one part perlite.
How to Know If You Mixed the Perlite Correctly
This is the part most guides skip, and it’s the difference between guessing and actually knowing your mix is right. It helps to understand what’s actually happening: perlite’s porous, cavity-filled structure can hold three to four times its own weight in water, similar to a sponge, while still letting excess drain past it. That’s why a well-mixed batch shouldn’t drain instantly, the perlite itself is holding onto some moisture even as the rest passes through.
Run through these four checks after watering:
- Water entry test: Does water soak into the surface within a few seconds, or does it sit and pool on top? Pooling usually means the top layer is too compact or the perlite isn’t distributed near the surface.
- Drainage test: Does water reach the drainage holes and come out within a reasonable time after watering? If nothing comes out at all, or it takes an unusually long time, the mix may still be too dense.
- Moisture retention test: Does the soil stay soggy for days afterward? That’s a sign the ratio may be too low for that plant, or the base mix is holding too much water.
- Drying speed test: Does the pot go bone dry within a day? That can mean the perlite ratio is too high for the plant, or the pot is too small for the volume of soil.
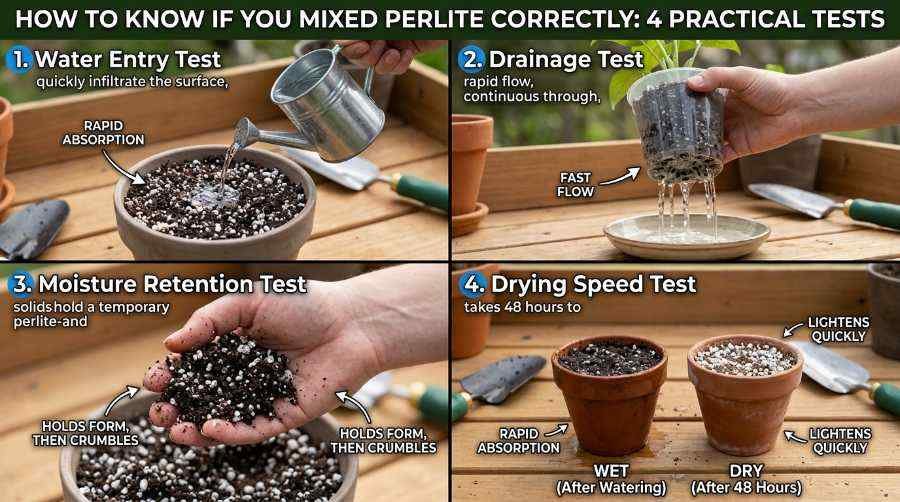
Here’s the principle behind all four tests: good drainage doesn’t mean water should disappear instantly. The goal is a balanced root zone, one with enough air pockets for oxygen and enough retained moisture for the roots to actually use.
My own observation:
A mix that drains in two seconds is not always better. I’ve seen new plant owners focus too much on fast drainage and end up with plants that need watering every day because the soil cannot hold enough moisture.
How to Adjust the Mix if It’s Not Working
If the soil stays too wet, check these in order:
- Perlite percentage: is it actually where you intended it to be?
- The base mix itself: some potting soils hold water regardless of additives
- Pot size: an oversized pot holds more moisture than the roots can use. Learn about best indoor plant pots from this article.
- Drainage holes: blocked or too few
- Light levels: low light slows how fast a plant uses water
- Watering frequency: are you watering on a fixed schedule instead of checking the soil first?
Adding more perlite isn’t always the fix. Sometimes the real problem is pot size or watering habits, and more perlite just masks it temporarily.
If the soil dries too quickly, try these instead:
- Reduce the perlite percentage slightly
- Add more moisture-retaining material like coco coir or peat
- Switch to a pot that holds moisture a bit longer, like plastic instead of terracotta
- Adjust how often you water rather than changing the mix again
How Much Perlite Should Different Indoor Plants Get?
This is a quick reference.
| Plant | Recommended Range | Notes |
|---|---|---|
| Snake plant | 30–50% | Airy, fast-draining, tolerates neglect |
| Pothos/philodendron | 25–30% | Balance moisture and air |
| Monstera / other aroids | 20–30% | Chunkier mix, not just more perlite |
| Peace lily/ferns | 20–30% | Prefers more consistent moisture |
| Succulents / cacti | 50–70% | Reduce prolonged wetness |
| Cuttings / propagation | Higher than the mature plant’s ratio | Extra air around developing roots |
- Snake plant: generally does best in an airy, fast-draining medium, on the higher end of the perlite range.
- Pothos and philodendron: usually want a slightly higher ratio than other aroids, enough perlite to keep air moving around the roots without drying out too fast between waterings.
- Monstera and other aroids: tend to benefit from a chunkier, airier root zone rather than simply maximizing perlite percentage.
- Peace lily and ferns: avoid pushing the mix toward extremely fast drainage. These plants prefer more consistent moisture than most aroids.
- Succulents and cacti: generally want a mineral-heavy, fast-draining medium, typically 50 to 70% perlite mixed with regular potting soil, to keep the roots from sitting in prolonged wetness.
- Cuttings and propagation: developing roots need extra oxygen more than they need retained moisture, so a higher perlite percentage than you’d use for the same plant once mature usually helps.
6 Common Mistakes When Adding Perlite
- Using the same ratio for every plant.
- Why it happens: it feels simpler to have one go-to recipe.
- How it shows up: succulents sit in soggy mix, moisture-loving plants dry out too fast.
- Fix: match the ratio to the plant category using the table above.
- Measuring by guesswork.
- Why it happens: it feels faster than pulling out a measuring cup.
- How it shows up: inconsistent results between pots that should behave the same way.
- Fix: use the volume formula and measure every batch the same way.
- Skipping a check of the existing mix.
- Why it happens: it’s an easy step to forget once you know your “target ratio.”
- How it shows up: soil ends up too loose when perlite is added to an already-chunky mix.
- Fix: run the five-point mix checklist before adding anything.
- Packing the finished mix too tightly.
- Why it happens: it feels more secure for the plant.
- How it shows up: compresses the air pockets perlite is supposed to create in the first place.
- Fix: firm the soil just enough to remove large gaps, nothing more.
- Assuming faster drainage is always better.
- Why it happens: perlite gets marketed almost entirely around “improving drainage.”
- How it shows up: plants that need watering daily because the mix can’t hold anything.
- Fix: some plants need moisture retention more than speed. Match the mix to the plant, not a general rule.
- Ignoring the pot and growing environment.
- Why it happens: the soil recipe gets treated as the only variable that matters.
- How it shows up: identical mixes behave differently in different rooms.
- Fix: reassess ratio based on light, pot material, and pot size, not soil alone.
Frequently Asked Questions
Can I mix perlite directly with potting soil?
Yes. Mixing it into a separate container before potting gives a more even result than trying to blend it in the pot itself.
Should I wet perlite before mixing?
Lightly dampening it helps cut down on dust and makes it easier to fold into the soil evenly.
Is 50% perlite too much?
Not for succulents and cacti. That range actually falls within their typical starting point of 50 to 70%. It would be too high for a moisture-loving plant like a peace lily or fern, and more than most aroids need.
Can I use perlite on top of soil?
Top-dressing with perlite mainly affects the surface layer and does little for drainage deeper in the pot. Mixing it throughout the soil is more effective.
Does perlite prevent root rot?
It reduces the risk by improving aeration and drainage, but it doesn’t guarantee prevention. Overwatering habits and pot drainage still play a major role.
How often should I replace perlite?
Perlite itself doesn’t break down quickly, but it’s usually replaced whenever you refresh the potting mix during repotting, roughly every one to two years for most houseplants.
A Quick Story
The first time I mixed perlite into soil, I eyeballed it, packed the pot tight, and wondered for weeks why my pothos looked worse, not better. Once I actually measured the ratio and left the mix loose, the difference showed within days.
Final Takeaway
Adding perlite isn’t about following one perfect recipe. Four steps cover the whole process:
- Choose your ratio, based on the plant and your existing mix
- Mix it in evenly, measured by volume rather than guesswork
- Test how it behaves over the following days
- Adjust if it isn’t working, without assuming more perlite is always the answer
Getting the right soil mix is just one part of keeping your plants healthy. For a complete overview of watering, light, humidity, soil, and other essentials, check out our complete guide to indoor plant care.