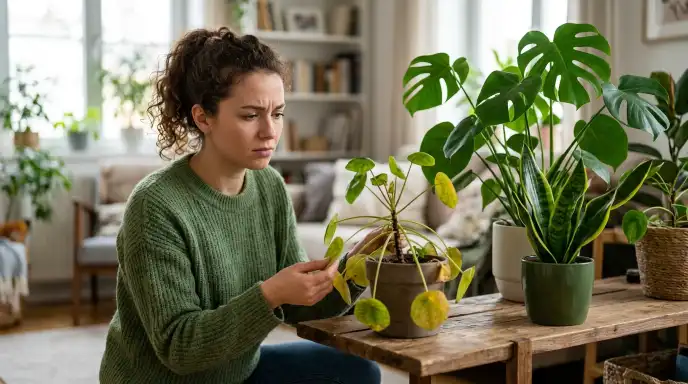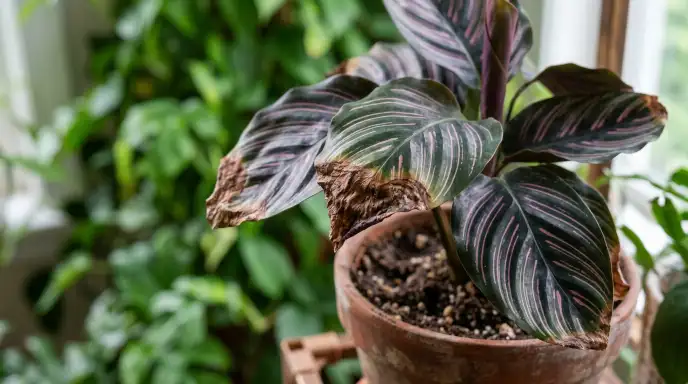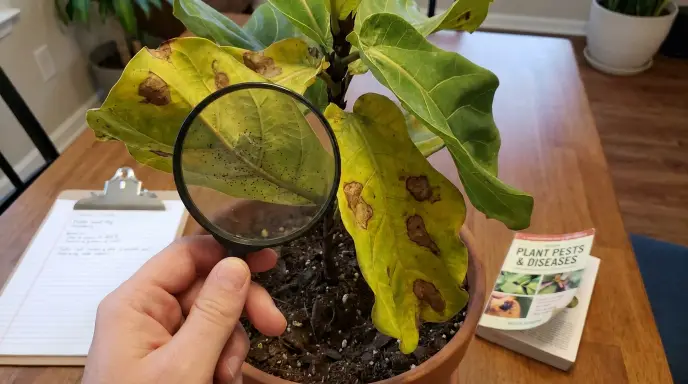
If your plant’s leaves have started looking dusty, speckled, or faintly bronzed, spider mites are one of the first things worth ruling in or out. Spider mites are one of the most common houseplant pests, but they’re far from the only one. If you’re dealing with white, cottony clusters instead of webbing, you may have cottony white pests (mealybugs); here’s how to treat them. For a complete overview of every common pest and the products that actually work, start with our comprehensive houseplant pest control guide. They’re one of the most common houseplant pests, and also one of the easiest to misdiagnose, because the early symptoms overlap with thrips, powdery mildew, dust buildup, and even simple nutrient deficiency. If you’re not yet sure whether pests are the problem at all, our symptom-by-symptom guide to a dying houseplant is a good place to narrow things down first.
This guide covers the full sequence: how to confirm you’re actually dealing with spider mites, how to treat them in a way that works with their life cycle instead of against it, and how to set up conditions that keep them from coming back. Treatment is the part most people rush, and it’s the reason infestations so often “come back” a few weeks later. They never actually left.
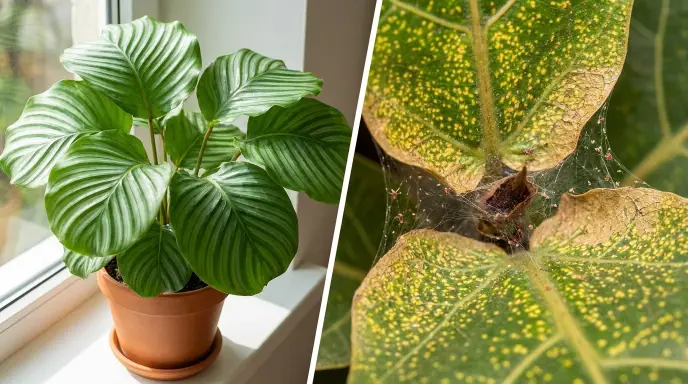
Table of Contents
What Spider Mites Actually Are
Despite the name, spider mites aren’t insects. They’re arachnids, closer relatives to spiders and ticks than to ants or aphids, which is why standard insecticides often don’t touch them. The species behind the vast majority of houseplant infestations is the two-spotted spider mite (Tetranychus urticae), named for the pair of darker spots visible through its body.
A few basics that matter for both diagnosis and treatment:
- Size: Adults are roughly 1/50 of an inch (about 0.3 to 0.5 mm) long, close to the size of a period on a printed page. You cannot get a reliable look at one with the naked eye alone.
- Color: They range from pale yellow-green to tan, red, or nearly translucent, depending on species, life stage, and diet.
- Location: They feed almost exclusively on the undersides of leaves. Damage usually shows on the top of the leaf before you ever spot the mites underneath.
- What they eat: This detail matters more than it sounds. Spider mites drain the contents of individual leaf cells rather than tapping into the plant’s sap-carrying vascular system. That single fact explains why certain treatments work and others fail, which we’ll come back to.
- Reproduction speed: Under warm conditions, spider mites can complete a full generation, egg to reproducing adult, in about five to eight days, and a single female can lay several eggs daily for weeks. A few spots one week can look like a full infestation the next.
That reproduction rate is not just trivia. It dictates the entire treatment schedule, and it’s the reason a single spray never works.
Part 1: How to Tell for Sure
The Four Signs That Point to Spider Mites
No single sign is conclusive on its own, which is exactly why misdiagnosis is so common. Together, they build a strong case.
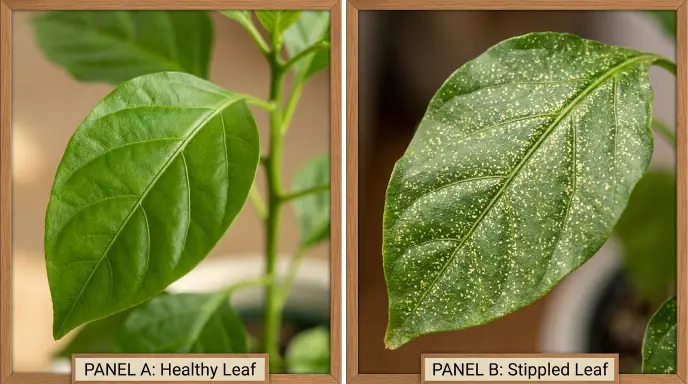
1. Stippling, meaning tiny pale or yellow dots on the leaf surface
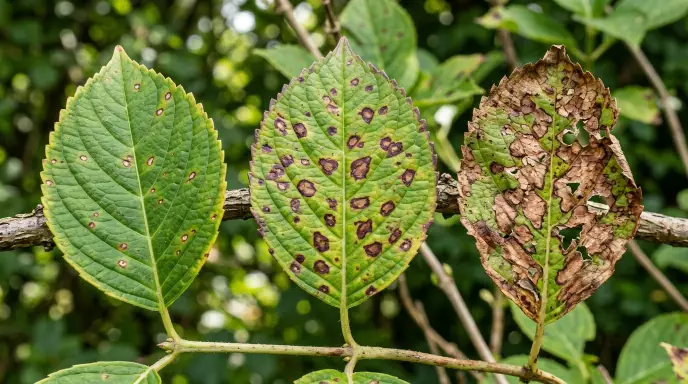
Usually the first thing people notice. Spider mites pierce individual plant cells and drain the contents, and each feeding site leaves a tiny discolored dot. Scattered individually, these can look like dust or a mild deficiency. As feeding continues, the dots merge into a stippled, faded, or bronzed patch, most concentrated near the leaf veins.
2. Fine, silk-like webbing
The most distinctive spider mite sign, but it typically only appears once a population is already well established. It’s a late indicator, not an early one. Check the undersides of leaves, the crook where a leaf meets the stem, and around new growth tips. The webbing is delicate and easy to miss unless you’re looking for it.
3. Leaf discoloration and premature drop
As feeding continues, affected leaves shift from stippled to a dull bronze, yellow, or grayish cast. In heavier infestations, leaves curl, dry out, and drop early. If your leaves are going brown and brittle rather than speckled, check our guide on crispy, dying leaves and the three causes behind them before assuming pests.
4. A gritty texture on the underside of the leaf
Run a finger gently along the underside of a suspect leaf. A faint, sandpaper-like grittiness can indicate mites, eggs, or webbing, which is something a healthy leaf shouldn’t have.
How to Confirm It: The White Paper Test
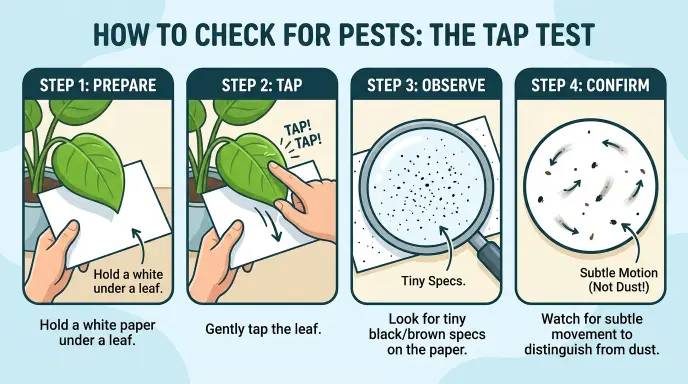
This is the method extension entomologists consistently recommend, and it takes under a minute.
- Hold a plain sheet of white paper flat beneath a suspect leaf or stem.
- Tap or shake the foliage firmly so any mites present are knocked loose.
- Look closely at the paper. Spider mites appear as specks, roughly the size of ground pepper.
- Wait a few seconds and look again. This is the step people skip. Dust and debris stay put. Spider mites move. Even slowly, even at that size, you should see the specks crawling if you look carefully.
My first calathea taught me this the hard way. I spent three weeks blaming dry air for the speckled leaves, misting daily, feeling productive. Then I finally held white paper underneath and tapped. The specks moved. By then the webbing had already spread to my maranta. Now I tap-test anything that looks faintly dusty, and I quarantine every new plant. Misting was never the problem. Not looking closely enough was.
A 10x hand lens or your phone’s zoom camera makes this far more conclusive. You’re looking for an oval, eight-legged body, or six legs at the larval stage, which is a useful early clue.
If the specks don’t move, you’re most likely looking at dust, hard-water mineral residue, or spray buildup rather than mites.
Spider Mites vs. the Problems People Confuse Them With
| Look-alike | Key similarity | The tell that rules it in or out |
|---|---|---|
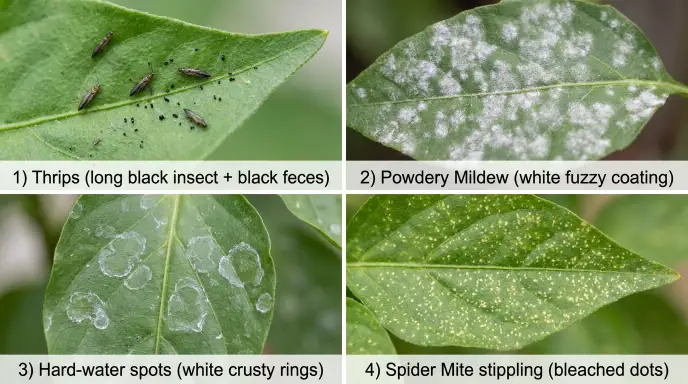
| Thrips | Also cause pale stippling and thrive in similar conditions | Thrips are winged, move fast, and leave tiny dark fecal specks on the leaf. They produce no webbing. Damage concentrates in flower buds and new growth, not just leaf undersides. |
| Powdery mildew | Both make a leaf look discolored at a glance | Powdery mildew is a fuzzy, powdery, distinctly white fungal coating sitting on the leaf surface. It doesn’t move and isn’t made of discrete dots. Our guide to telling bacterial, fungal, and sunburn damage apart covers this in detail. |
| Broad mites and russet mites | Both near-invisible, with damage appearing before you notice the pest | Far smaller than spider mites, often invisible even under a standard hand lens, and they rarely produce webbing. Their signature is twisted, cupped, or bronzed new growth rather than stippling on mature leaves. Newest leaves distorted with no webbing anywhere? Suspect these instead. |
| Dust or hard-water spots | Both look like a fine, gritty coating | Dust and mineral deposits are static and wipe away cleanly with a damp cloth. Mite damage is embedded in leaf tissue and won’t wipe off. |
| Nutrient deficiency | Both cause yellowing or pale patches | Deficiency yellowing follows a pattern tied to leaf veins and progresses evenly. If the yellowing looks structured rather than speckled, work through how to tell light problems from nutrient problems instead. |
| Sun scorch | Both bleach and discolor foliage | Scorch appears on the leaf surfaces facing the light source and often has crisp, papery edges. Here’s how to fix a sunburned plant if that’s the better match. |
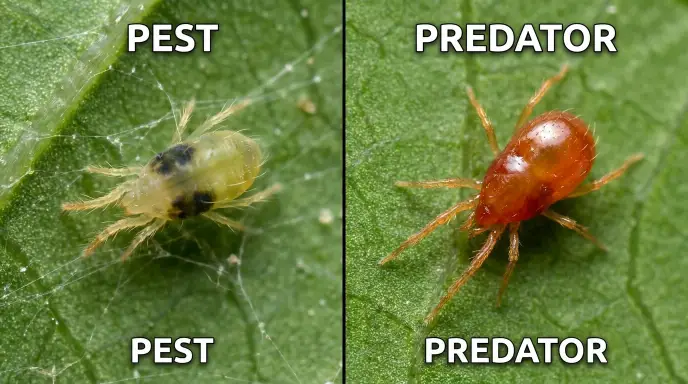
| Predatory mites (beneficial) | Nearly identical size and shape | Predatory mites are shinier, more pear-shaped, unspotted, and noticeably faster thanks to longer legs. Fast-moving, glossy mites plus minimal damage may mean you have an ally, not a pest. |
Part 2: How to Get Rid of Spider Mites
Spider mites rarely lose to a stronger product. They lose to coverage and timing. Understanding why changes how you treat them.
Why Single Treatments Always Fail
Two facts drive everything:
- Most common treatments don’t kill eggs. Insecticidal soap works on contact against soft-bodied adults and nymphs. It has essentially no residual action and washes away easily. Eggs survive.
- Eggs hatch in roughly three to six days under normal indoor conditions.
So a single thorough spray kills the active population and leaves the next generation waiting to hatch. Ten days later, the plant looks infested again, and people conclude the treatment “didn’t work.” It worked. It just wasn’t repeated across the hatch cycle.
The fix is a repeat schedule that outlasts every egg on the plant.
The Treatment Protocol
Step 1: Isolate the plant, and change how you handle it.
Spider mites spread by leaf contact, walking, and drifting through the air on strands of webbing. Move the affected plant well away from your other plants before you do anything else, and inspect anything that was touching it.
The part most guides miss is that you are also a vector. Mites hitch rides on sleeves, hands, watering cans, and pruning snips. Two simple habits close that gap:
- Tend the infested plant last in your watering and care routine, never first.
- Wash your hands and change your shirt before touching healthy plants again, and don’t share tools between the quarantined plant and the rest of your collection without cleaning them.
This costs nothing and prevents the most common way a single infested plant becomes five.
Step 2: Prune the worst-hit growth.
On heavily infested plants, remove the most damaged leaves and stems and dispose of them away from your collection, not in an open bin next to your plants. This removes a large share of the population and eggs before you spray anything. A clean, sharp pair of snips helps here, and a basic indoor gardening tool kit covers most of what this job needs.
Step 3: Rinse thoroughly.
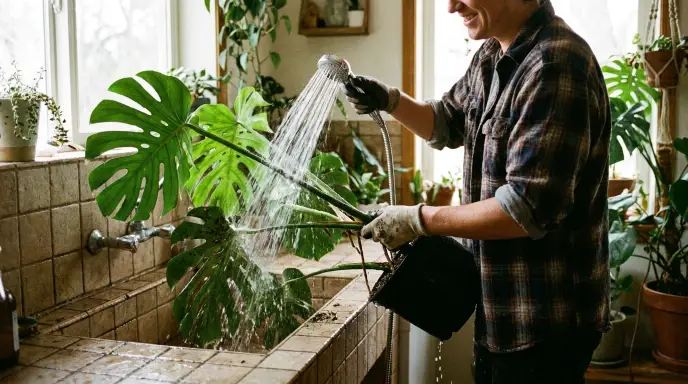
Take the plant to a sink, shower, or hose and wash the foliage with lukewarm water, concentrating on leaf undersides. Gently rub leaves as you go to dislodge mites and webbing. This physical knockdown meaningfully reduces the population and makes the next step more effective. Rinsing alone won’t solve the problem, but skipping it makes everything after it harder.
For small plants, briefly swishing the foliage through a basin of lukewarm water can reach undersides and stem junctions that spraying misses. Support the soil with your hand or wrap the pot in fabric so it doesn’t wash out. Keep it brief and rinse afterward. You may see advice online to submerge foliage in a soap solution for fifteen or twenty minutes, but prolonged soaking in soap is a real phytotoxicity risk and isn’t what extension services actually recommend. The extension version of the dunking method involves submerging the pot to flush soil-dwelling pests, which is a different problem from foliar mites.
Step 4: Mix your treatment with the right water.
This is the step almost nobody mentions, and it quietly ruins a lot of treatment attempts.
Insecticidal soap works because it’s built from potassium salts of fatty acids. In hard water, the calcium, magnesium, and iron bind to those fatty acids and precipitate them out of solution. What’s left is cloudy scum with little to no pesticidal activity. You can spray a plant perfectly and get almost nothing out of it.
Extension services from Penn State, Missouri, and LSU all flag this, and there’s a simple test:
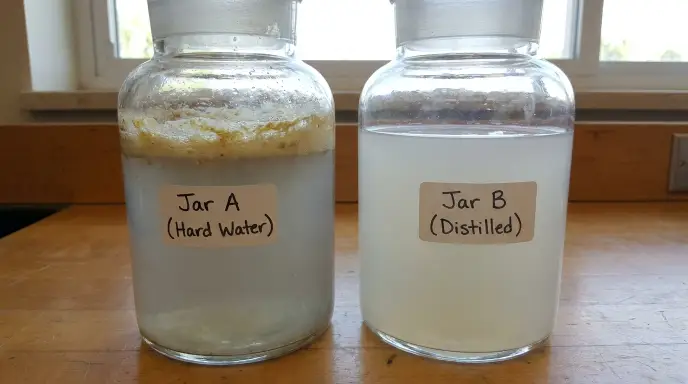
The jar test:
Mix a batch of insecticidal soap with your tap water in a glass jar, shake it, and let it stand for fifteen to thirty minutes. If it stays milky and uniform, your water is fine. If a scum forms on the surface, switch to distilled or filtered water.
If your tap water leaves white deposits on your leaves or fixtures, assume it’s too hard and use distilled water from the start.
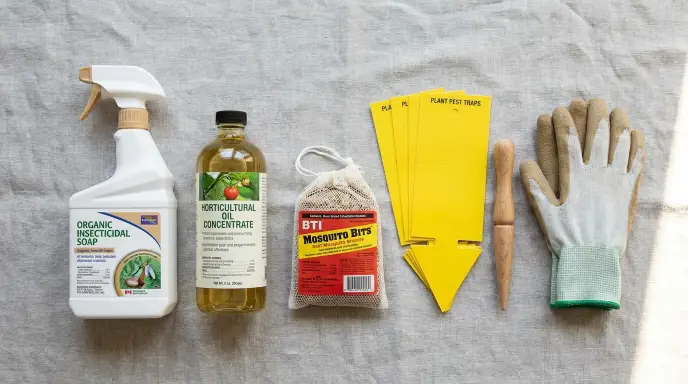
Step 5: Apply insecticidal soap or horticultural oil.
These are the two workhorse options for home use, and they work differently:
- Insecticidal soap kills soft-bodied mites on contact by disrupting their cell membranes. No residual activity, so coverage on the day of spraying is everything.
- Horticultural oil works by smothering, and unlike soap, it can also kill eggs, which is why some growers lean on it for stubborn infestations.
Follow the product label for dilution. Coat every surface, especially leaf undersides, stem junctions, and growing tips. Any patch you miss is where the population rebuilds.
Spray in the early morning or evening rather than midday. Slower drying keeps the solution in contact with mites longer, which is exactly what a contact treatment needs.

Step 6: Handle the plant correctly for 24 hours afterward.
Both soaps and oils temporarily make foliage more vulnerable to light and heat damage. Spraying a plant and then setting it back in a bright window is how people end up with scorched leaves that look like the infestation is getting worse.
- Keep treated plants out of direct sun for at least 24 hours, until the foliage is fully dry and then some.
- Avoid treating during a heat wave or when the plant is sitting somewhere hot.
- Keep pets and children away from sprayed foliage until it’s completely dry. Insecticidal soaps and horticultural oils are low-toxicity products, but they can cause stomach upset if a curious cat or dog chews on wet leaves.
Step 7: Repeat every 3 to 7 days for at least three to four weeks.
This is the step that decides whether treatment succeeds. Repeat applications on schedule so each new wave of hatchlings is killed before it can reproduce. Follow label frequency limits. More frequent spraying is not better, and it can damage the plant. Colorado State University’s guidance leans toward the longer end of that window, roughly four to seven days between applications, and spraying any given plant as few times as you can get away with.
Step 8: Confirm eradication before declaring victory.
Do the white paper tap test again. Two consecutive clean tests, several days apart, is a reasonable bar. One important note: existing damage will not heal. Stippled and bronzed leaves stay that way. Judge progress by whether new growth comes in clean, not by whether old leaves recover.
Mistakes That Sabotage Treatment
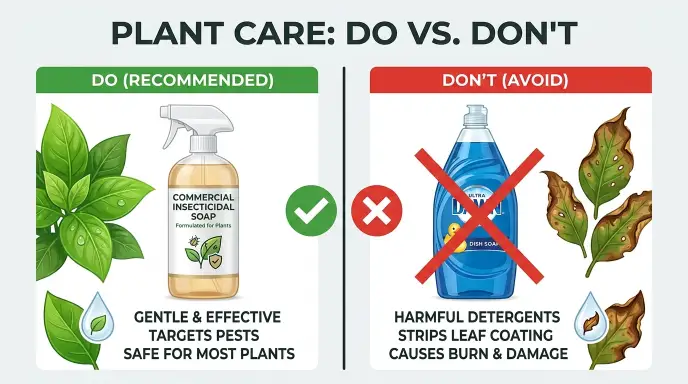
Using dish soap instead of insecticidal soap:
This is the single most common piece of bad advice in beginner spider mite content, and several currently ranking articles still recommend it. Dish soap is technically a detergent, not a soap, and it’s a different class of molecule derived from petrochemicals. Detergents are designed to strip grease and wax, and plant leaves are coated in a protective waxy cuticle. Iowa State University Extension is direct about this: dish soap is more likely to damage the plant through phytotoxicity, and its effect on pests is limited and inconsistent. Insecticidal soap is a true soap, formulated with potassium salts of fatty acids specifically to be effective on pests and gentle on foliage. It’s inexpensive and widely available. Use the real thing.
Spraying a plant that’s already stressed:
University IPM guidance is consistent here: don’t apply treatments to plants stressed by extreme temperature, low humidity, or insufficient moisture. Water the plant well and let it stabilize first. Spraying a drought-stressed plant risks leaf burn on top of the mite damage. If the plant is bone dry going into treatment, work through a rehydration checklist before you spray anything.
Increasing spray frequency when something isn’t working:
Most products have decent residual behavior, and spraying more often mainly increases plant stress and resistance pressure. If a treatment isn’t working, switch to a product with a different mode of action rather than doubling down on the same one.
Ignoring resistance:
Two-spotted spider mites are notorious for developing resistance quickly, a direct consequence of their short life cycle and high reproductive rate. Commercial growers manage this by rotating between products with genuinely different modes of action rather than relying on one. At home, this translates to a simple habit: alternate between insecticidal soap and horticultural oil (or a neem-based product) across your treatment cycle rather than reaching for the same bottle every time.
Reaching for a systemic insecticide:
This is worth understanding, because systemics are marketed heavily and they’re a poor fit here. Systemic products move through the plant’s vascular system and reach pests that drink sap. Spider mites don’t drink sap. They puncture individual leaf cells and drain the contents, so a product circulating through the plant’s plumbing is largely bypassing where they feed. If you do move to a dedicated miticide after soaps and oils fail, look for one described as translaminar, meaning it penetrates into the leaf tissue itself rather than relying on vascular transport. Read the label, confirm mites are listed, and confirm it’s approved for indoor or houseplant use.
Treating only the plant:
Mites disperse onto nearby surfaces, shelves, and pots. Wipe down the area around an infested plant, not just the plant itself.
Assuming misting is a treatment:
It isn’t. Raising humidity slows mites down. It does not eliminate them.
When to Cut Your Losses
This is rarely said in beginner content, but extension services state it plainly: a small plant that’s heavily infested is often not worth saving. Between the weeks of repeat treatment required and the ongoing risk to the rest of your collection, discarding a badly damaged plant is frequently the faster and safer call. Larger or higher-value plants are worth the effort. Prune hard first, then treat.
What About Predatory Mites?
Biological control is a legitimate option and works well in greenhouses. Predatory mites from the Phytoseiidae family feed on spider mites at every life stage, including eggs, and a single predator can consume several adults or around twenty eggs a day. For home use, they’re most practical for larger plant collections or grow tents, and they work best when released after an initial knockdown rather than into a full-blown infestation.
Timing matters more than most people realize. Predators die on contact with residues just like pests do, so releasing them onto freshly treated foliage wastes your money:
- After insecticidal soap: soap loses activity once it dries, so a day or two is generally enough.
- After horticultural oil or neem: these persist considerably longer. Give it about a week before introducing predators.
- After any broad-spectrum pesticide: don’t combine the two approaches at all. Pick one.
Part 3: How to Prevent Spider Mites
Prevention is meaningfully easier than treatment, and it comes down to four habits.
1. Quarantine Every New Plant
Nearly every indoor infestation arrives on a new plant, or on a plant brought in from outdoors. Isolate anything new, whether it came from a nursery, a plant swap, or a friend, in a separate room away from your collection.
- New nursery plants: two weeks minimum, inspecting leaf undersides with a hand lens during that window.
- Plants brought in from outdoors: extension guidance recommends closer to a full month of isolation, with regular inspection, before integrating them.
Do at least one white paper tap test partway through the quarantine period. It takes a minute, and it’s the highest-leverage prevention step available.
2. Keep Conditions Unfavorable, but Understand the Limits
Spider mites thrive in hot, dry, dusty, still-air conditions. This is why indoor infestations spike in winter, when forced-air heating strips moisture out of the room, and outdoors during hot, dry summers. If you’re heading into either season, our guides on protecting indoor plants from winter cold and summer care during extreme heat both cover the environmental side.
Practical steps:
- Raise humidity around plants. A humidifier is the most reliable option, and there are also several ways to raise humidity without one. Our full breakdown of ten methods for increasing humidity for indoor plants compares them side by side.
- Track what your air is actually doing. Guessing at humidity is how people convince themselves a room is fine when it’s sitting at 25 percent. An inexpensive digital hygrometer removes the guesswork.
- Keep air gently moving rather than stagnant.
- Don’t overwater in an attempt to raise humidity. You’ll trade a mite problem for root rot, which is considerably harder to reverse.
An honest caveat that most articles get wrong:
High humidity is not a force field. Research indicates spider mites reproduce successfully across the 30 to 70 percent relative humidity range found in most homes. Raising humidity slows population growth and reduces flare-ups. It does not make plants immune. Treat it as one layer of defense rather than the whole strategy. This is also why pebble trays disappoint so many people, and we tested exactly how little difference they make.
3. Don’t Trust a Quiet Winter
Here’s the thing that catches people out year after year, and it explains the “my mites came back from nowhere” mystery.
As days get shorter in autumn, adult female two-spotted spider mites can enter a dormant state called diapause. They turn a distinctly deep orange, stop feeding entirely, stop laying eggs, and go looking for sheltered spots to wait out the season. Some leave the plant altogether and tuck into soil, debris, or crevices nearby.
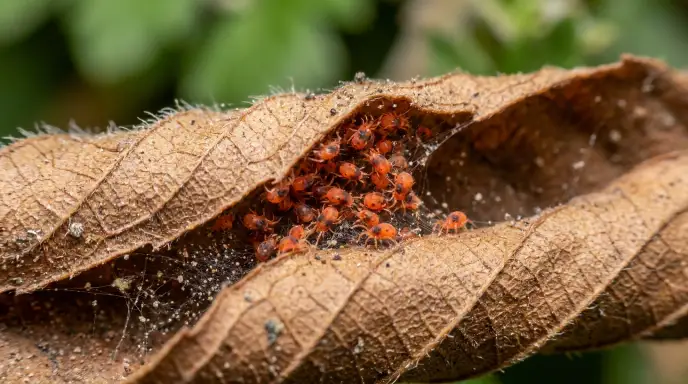
Two practical consequences:
- A sudden drop in activity isn’t proof of success. The population may simply have gone quiet. If your treatment ended right as things went dormant, you didn’t finish the job.
- Dormant mites are hard to kill. Because they’ve stopped feeding and left exposed leaf surfaces, contact sprays reach far fewer of them.
If you fought an infestation in late summer or autumn, resume inspections in early spring as light levels climb and temperatures rise. Orange specks on leaf undersides are the telltale sign. Catching a re-emerging population before it starts laying eggs again is dramatically easier than fighting a full outbreak in June.
4. Clean Leaves, Inspect on a Schedule, and Keep Plants Healthy
Dust accumulation favors mites, and dusty leaves also make early stippling much harder to spot. Wipe large-leaved plants with a damp cloth every week or two, and give sturdy plants an occasional shower. This does double duty: it removes dust and physically dislodges any mites that have started to establish.
Build inspection into the routine rather than treating it as a response to a problem. Check leaf undersides, stem junctions, and new growth.
Beyond that, stressed and water-deprived plants are more vulnerable to mites and tolerate damage far worse than vigorous ones. The two areas worth getting right first are watering and light. Most people water on a schedule rather than on demand, which is how plants end up either chronically dry (mite-friendly) or waterlogged. Our guide to watering houseplants correctly covers the deep-watering method that solves both. On the light side, matching plants to your room’s actual light level keeps them strong enough to shrug off minor pest pressure. Heat is the third factor worth watching, since heat-stressed plants sit in exactly the hot, dry conditions mites prefer.
Which Houseplants Deserve Extra Vigilance
Any plant can get spider mites, but thin, delicate, or densely growing foliage gets hit hardest:

- Calathea, Maranta, Ctenanthe, and Stromanthe (the prayer-plant family), whose thin, papery leaves are especially vulnerable
- Ficus, including fiddle leaf fig and rubber plant
- Palms (areca, majesty, parlor palm), whose fronds offer abundant hiding spots and are hard to treat thoroughly
- Alocasia
- English ivy
- Croton
- Norfolk Island pine
- Rosemary grown indoors
Notice the overlap with plants that want high humidity. Many of the species on our list of humidity-loving plants are on this list too, and that’s not a coincidence. They come from environments where the air is damp, so a dry living room stresses them and invites the exact pest that thrives there. If you own several of these, weekly leaf-underside checks during dry winter months are worth the habit.
Quick FAQ
Can you see spider mites without a magnifying glass?
Barely, and only if you know what you’re looking for. Most people notice the damage, whether stippling or webbing, before they ever spot an individual mite.
Do spider mites always leave webbing?
No. Webbing typically appears only once a population is well established. Early infestations often show stippling alone. There’s also a false spider mite (Brevipalpus species) that damages houseplants without producing webbing at all, which is exactly why webbing shouldn’t be your only diagnostic criterion.
Why do my spider mites keep coming back every spring?
Almost certainly diapause. Female mites go dormant as daylight shortens, turning orange and hiding in soil, debris, or crevices without feeding. They aren’t gone, just waiting. When light and warmth return, they resume feeding and laying eggs. Resume inspections in early spring rather than assuming winter solved it.
Will my plant recover from spider mite damage?
The plant can recover. The damaged leaves won’t. Stippled and bronzed tissue is permanently damaged. Judge recovery by clean new growth, and prune badly disfigured leaves once the infestation is confirmed gone.
Are spider mites harmful to people or pets?
The mites themselves are harmless. They feed exclusively on plant tissue and don’t bite or transmit disease. The treatments deserve more caution: keep pets and children away from sprayed foliage until it’s fully dry, since soaps and oils can cause stomach upset if ingested.
Does neem oil kill spider mites?
Neem oil can suppress spider mites. It disrupts feeding, growth, and reproduction rather than killing purely on contact, so it works gradually and requires repeat applications on the same schedule as other treatments. Treat it as a rotation partner alongside insecticidal soap and horticultural oil rather than a one-shot solution.
Can spider mites live in soil?
They’re foliage feeders, not soil dwellers, so soil isn’t where they eat. Dormant overwintering females do shelter in soil, debris, and crevices, which is one reason infestations seem to reappear from nowhere after a quiet period.
Why isn’t my insecticidal soap working?
Three usual suspects, in order of likelihood: hard water is precipitating the soap before it ever reaches the mites (run the jar test above), coverage missed leaf undersides where mites actually live, or applications stopped before the last eggs hatched. Resistance is possible but less common than these three.
How long does it take to fully get rid of spider mites?
Realistically, three to four weeks of consistent repeat treatment for an established infestation. Anything faster usually means the eggs weren’t dealt with, and the problem returns.
The Bottom Line
Spider mites feel overwhelming mostly because they’re invisible until the damage isn’t. But once you strip away the panic, this is a manageable problem with a clear sequence.
Confirm before you treat. Tap a leaf over white paper and watch for movement. Thirty seconds of checking prevents weeks of treating the wrong problem with the wrong product.
Treat on their schedule, not yours. Rinse, mix with the right water, spray the undersides of leaves thoroughly, keep the plant out of direct sun for a day, and repeat every few days for three to four weeks. Coverage and consistency beat any “stronger” product on the shelf.
Then make your home a place they don’t want to be. Quarantine new plants, wash your hands between plants, keep humidity reasonable, wipe the dust off, and check again in spring even if winter looked quiet.
Here’s the part worth holding onto: almost everyone who keeps houseplants long enough deals with spider mites at some point. It isn’t a sign you’re doing something wrong. Catching them early and knowing exactly what to do next is what separates a two-week nuisance from a lost plant collection, and you now know both.
Where to go next
- Still not certain pests are the culprit? Start with the houseplant symptom checker and work backward from what you’re seeing.
- Dealing with spots rather than speckling? Compare bacterial, fungal, and sunburn damage.
- Want to prevent the conditions that invite mites in the first place? Start with raising humidity for indoor plants.
- New to houseplants and want the fundamentals in one place? Our complete beginner’s guide to indoor plant care covers light, water, soil, and drainage from the ground up.