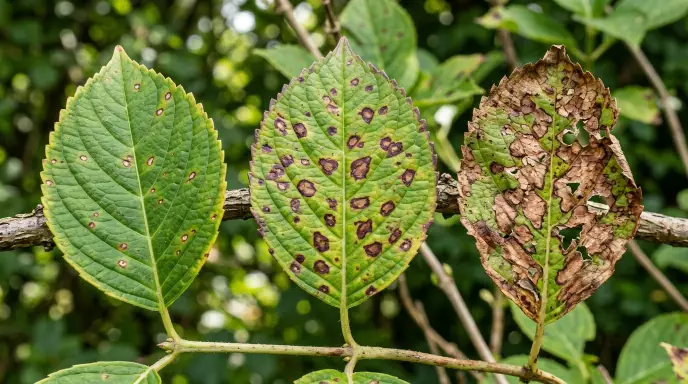
You have been watering. You have moved it closer to the window, then farther away. You have even apologized to it. Yet somehow, your plant’s leaves are turning brown, crispy, and brittle, and you have no idea why. Before you diagnose crispy leaves as a watering issue, check if it’s bacterial, fungal, or sunburn.
Take a breath. You are not alone.
Crispy leaves rank among the most common and frustrating problems for plant owners. According to RHS gardening experts, leaves can turn brown in three distinct ways: on the edges and tips, within the leaf itself, or across the entire leaf surface. Each pattern points to a different culprit. Crispy leaves can come from multiple causes. For a complete diagnostic approach that covers pests, diseases, watering, and light issues, check out How to Diagnose Indoor Plant Problems.
Here is the good news: once you know what to look for, diagnosing the problem takes less than sixty seconds. This guide cuts through the guesswork and gives you a clear, step-by-step way to identify and fix the real culprit.
Let us find out what is killing your plant.
The Sixty-Second Diagnosis: Which Killer Is It?
Before you change anything, look at your plant right now and ask one question:
Where is the damage happening?
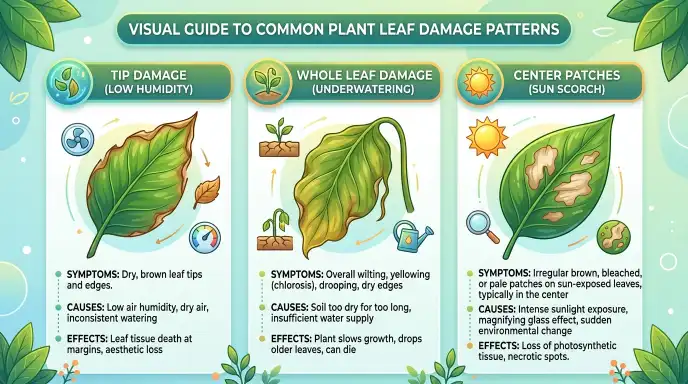
This single observation tells you eighty percent of what you need to know. Use this cheat sheet to match your plant’s symptoms to the most likely cause:
| Where the Damage Is | What It Looks Like | Most Likely Culprit |
|---|---|---|
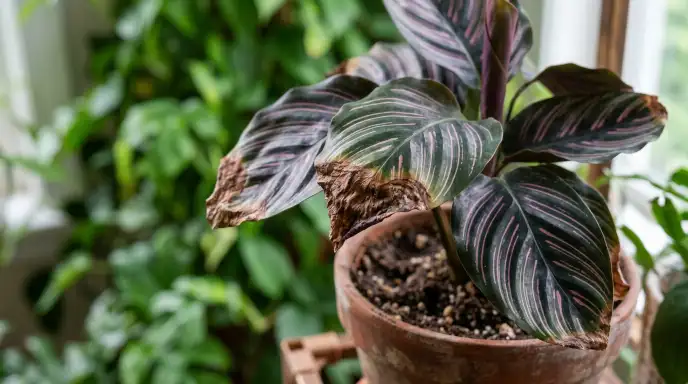
| Tips and edges are brown and crispy; edges may curl | Tips turn brown first, then browning creeps inward along the edges | Killer #1: Dry Air / Low Humidity |
| Whole leaf is brown, papery, and brittle; pot feels light | The leaf has dried out completely, not just at the edges | Killer #2: Underwatering |
| Bleached, tan, or white patches in the middle of the leaf | Looks like a sunburn, papery spots in the center, not along the edges | Killer #3: Sun Scorch / Heat Stress |
| Brown tips + white crust on soil or pot rim | Tips are crispy, but you also see a chalky white residue | Bonus Culprit: Salt Buildup / Tap Water |
| Crispy leaves + wet soil | Leaves are brown and crispy, but the soil is soggy, and the pot feels heavy | The Paradox: Overwatering (Root Rot) |
If you’ve confirmed sunburn is the cause, follow our step-by-step sunburn recovery guide to save your plant.
My Own Plant Drama: A Learning Experience
Last winter, my favorite Calathea started looking rough. Brown tips appeared on every leaf. I assumed it needed more water, so I watered more. The soil stayed wet for days. The tips kept browning. I was frustrated.
Finally, I pulled it from the pot. The roots were brown and mushy, which meant root rot. I had been overwatering because I misread the symptom. The plant was thirsty because the roots were dead, not because the soil was dry.
I trimmed the dead roots, repotted it in fresh soil, and moved it to a spot with better airflow. Three months later, new leaves emerged, perfect and green.
The lesson:
Look at the roots before you change anything else. Read root rot vs. underwatering in this guide.
Killer #1: Dry Air (Low Humidity)
The tell: Your plant’s leaf tips are brown and crispy, and the edges are starting to curl inward. The damage usually starts at the very tip and slowly spreads down the edges of the leaf.
The science: Tropical plants lose moisture through their leaves in a process called transpiration. When the air is too dry, especially during winter with central heating running, moisture evaporates from the leaf tips faster than the roots can replace it. The leaf margins die back, turning brown and crispy.
If your home’s humidity drops below forty to fifty percent, this is almost certainly your problem. Winter indoor humidity can plummet as low as ten percent with heating systems running.
How to fix it:
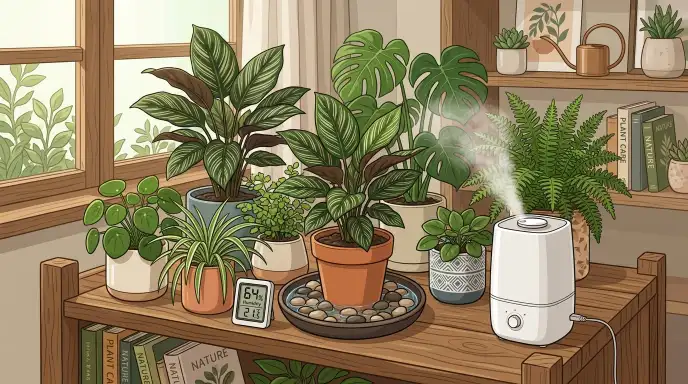
- Move it away from heat sources. Keep plants at least thirty to fifty centimeters away from radiators, vents, and fireplaces.
- Group plants together. Clustering plants creates a micro-climate with higher humidity.
- Use a pebble tray. Place your pot on a tray filled with pebbles and water, but make sure the pot sits above the waterline, not in it.
- Invest in a humidifier. For humidity-loving plants like Calatheas, Ferns, and Anthuriums, this is often the most effective solution.
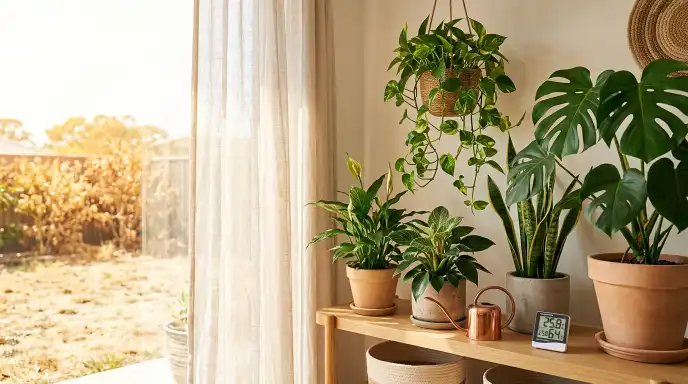
- Measure it. A simple digital hygrometer removes all guesswork. Also read this article to know how to increase humidity naturally.
Plants most affected by dry air:
- Calatheas
- Ferns (especially Maidenhair Ferns)
- Anthuriums
- Prayer Plants (Marantas)
- Orchids
Killer #2: Underwatering
The tell: The entire leaf is crispy, papery, and brown, not just the tips. The damage appears evenly across the plant, and when you lift the pot, it feels noticeably light. The soil might even be pulling away from the sides of the pot.
The science: Your plant simply ran out of water. Unlike low humidity, which affects the tips first, underwatering causes the whole leaf to dry out completely because the roots have nothing to deliver.
How to fix it:
- Water thoroughly. Give your plant a deep drink until water runs freely from the drainage holes.
- For severely dry soil, try bottom watering. Place the pot in a bowl of water and let it soak for twenty to thirty minutes.
- Check the soil properly. Push your finger two to three inches into the soil. If it is dry at that depth, it is time to water.
- Be consistent. Avoid the dry shock cycle, letting the soil go bone dry, then soaking it. This repeated stress contributes to brown tips.
- Establish a watering schedule based on your plant’s specific needs, not a fixed calendar day.
Signs of underwatering to watch for:
- Soil pulling away from pot edges
- Pot feeling unusually light
- Leaves drooping before turning crispy
- Slow or stunted growth
Also read this article to learn about overwatering vs underwatering.
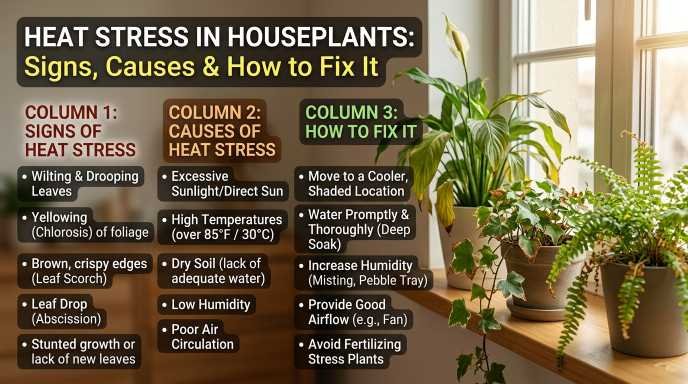
Killer #3: Sun Scorch and Heat Stress
The tell: Bleached, tan, or white papery patches appear in the middle of the leaf, not at the tips or edges. This damage is often concentrated on the side of the plant facing the window.
The science: Tropical houseplants are not adapted to direct afternoon sun. When placed in a south- or west-facing window, the intense sunlight literally burns the leaf tissue. Sun scorch can also come from the sun angle changing in spring, suddenly exposing leaves that were previously shaded.
How to fix it:
- Move it back. Pull the plant thirty to sixty centimeters away from the window.
- Filter the light. Use a sheer curtain to diffuse harsh sunlight.
- Know your plant’s needs. A Sansevieria or ZZ Plant can handle direct sun; a Calathea or Fern will burn quickly.
- Rotate your plant regularly to ensure even light exposure.
- Gradually acclimate plants to brighter spots rather than moving them suddenly.
Plants that scorch easily:
- Calatheas
- Ferns
- Philodendrons
- Monstera (when exposed to direct afternoon sun)
- Peace Lilies
Plants that tolerate direct sun:
- Sansevieria (Snake Plant)
- ZZ Plant
- Succulents
- Cacti
- Ponytail Palm
The Overwatering Paradox
Here is where things get confusing, and where most plant owners get it wrong.
The tell: Your plant’s leaves are brown and crispy, but when you check the soil, it is wet. The pot feels heavy, and the roots might even smell musty.
The science: Overwatering causes root rot. When roots are damaged by rot, they can no longer transport water to the leaves, even though the soil is saturated. The plant effectively dies of thirst while sitting in water, and the leaves turn brown and crispy as a result.
Yes, overwatering can cause crispy leaves. This is the most commonly misunderstood symptom.
How to fix it:
- Stop watering immediately. Let the soil dry out significantly between waterings.
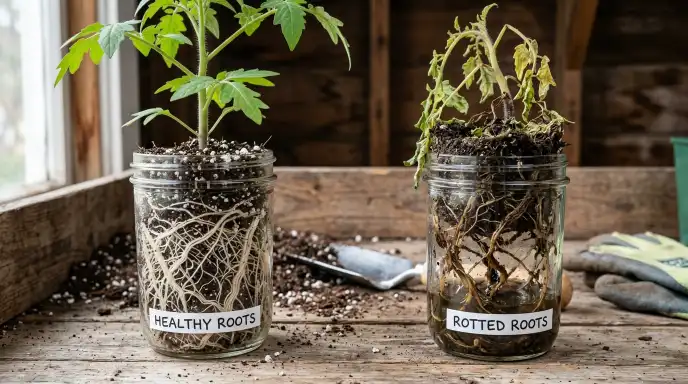
- Check for root rot. Gently remove the plant from its pot.
- Healthy roots are firm and white; rotting roots are brown, mushy, and may smell bad.
- Improve drainage. Ensure your pot has drainage holes.
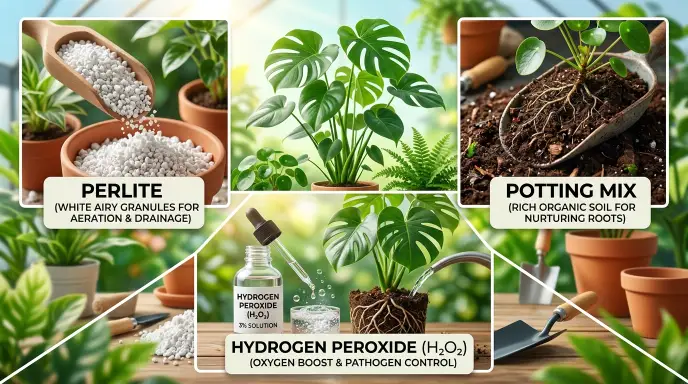
- Consider repotting with a chunkier, better-draining soil mix with added perlite or orchid bark.
- Water only when needed. Use the finger test. If the top two to three inches of soil are still moist, wait a few more days.
Signs of root rot:
- Foul, musty odor from soil
- Mushy, dark roots
- Yellowing leaves that eventually turn crispy
- Sudden wilting despite wet soil
- Fungus gnats around the plant
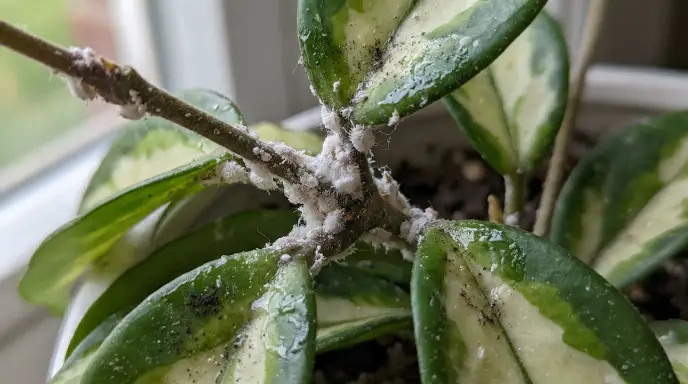
Read our houseplants dying symptoms and fixes guide to learn details about all plant problems. Spider mites can cause crispy, bronzed leaves. Here’s how to tell its spider mites and how to prevent them.
The Tap Water Factor
Most articles mention tap water as a minor issue. Here is what they do not tell you clearly enough:
Tap water damage is caused by salt buildup from repeated watering. Municipal water contains chlorine, chloramine, fluoride, and dissolved minerals. While these do not hurt us, they accumulate in potting soil because there is no place for them to wash away, unlike outdoor plants where rainwater flushes them deep into the ground.
The symptom:
Brown tips and edges, often accompanied by a white, chalky crust on the soil surface or around the pot rim.
Which plants are most sensitive:
Calatheas, Spider Plants, Dracaenas, Marantas, and Cordylines are particularly vulnerable to fluoride in tap water and will develop brown leaf margins as a result. Pilea can also be sensitive to chlorine, fluoride, and heavy minerals found in municipal tap water, which they push to the edges of their leaves, causing chemical burns.
How to fix it:
- Switch your water. Use distilled water, rainwater, or filtered water for sensitive species.
- Flush the soil. Run plenty of water through the pot for one to two minutes to wash away accumulated salts. Let it drain completely.
- Reduce fertilizer. Over-fertilizing adds more salts to the soil. Use half-strength fertilizer for indoor plants. Read this guide to learn fertilizing methods.
- Repot annually with fresh soil to reset salt levels. Also read how to repot without killing plants in this guide.
- Use a water filter that specifically removes fluoride, not just chlorine.
Tap water sensitivity chart:
| Plant Type | Sensitivity Level | Recommended Water |
|---|---|---|
| Calatheas | High | Distilled or Rainwater |
| Spider Plants | High | Filtered or Rainwater |
| Dracaenas | High | Distilled or Rainwater |
| Marantas | High | Distilled or Rainwater |
| Ferns | Medium | Filtered Water |
| Peace Lilies | Medium | Filtered Water |
| Snake Plants | Low | Tap Water (okay) |
| ZZ Plants | Low | Tap Water (okay) |
The Repotting Connection
Sometimes brown tips appear even when your routine has not changed. The plant was green and beautiful, then suddenly, brown tips appear out of nowhere.
The tell:
Your plant is severely potbound. Roots are coming out of the drainage holes, or the plant dries out so fast you cannot keep up with watering.
The science:
When a plant is potbound, there is little room for water because the roots take up most of the space. As water travels from the roots to the stems and leaves, there is not enough water to reach the leaf tips, and they turn brown.
This phenomenon can happen dramatically with plants like cast iron plants and peace lilies.
How to fix it:
- Check if roots are visible at the drainage holes.
- Gently remove the plant from its pot to inspect the root ball.
- If roots are circling densely, it is time to repot.
- Choose a pot one to two sizes larger. Read our how to choose right pot size article.
- Use fresh potting mix and water thoroughly after repotting.
When to repot:
- Roots emerging from drainage holes
- Water runs straight through without being absorbed
- Plant dries out within a day or two of watering
- Visible roots circling on the soil surface
Will the Brown Leaves Turn Green Again?
No. Once leaf tissue dies and turns crispy, it will not recover or turn green again.
But do not panic. This does not mean your plant is doomed. The goal is to address the underlying cause so that new leaves grow healthy and undamaged.
How to trim damaged leaves:
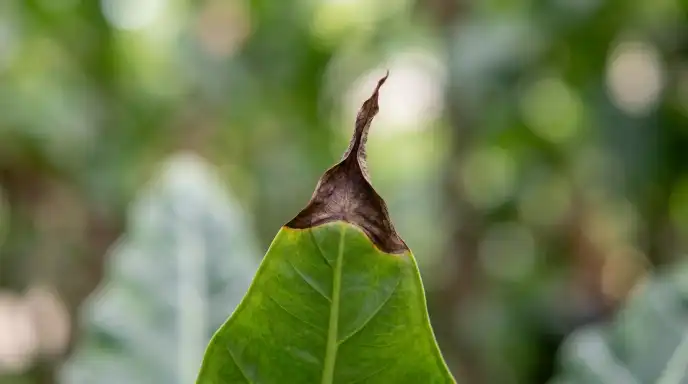
- Use clean, sharp scissors or pruning shears. Wipe the blades with rubbing alcohol before and after to avoid transferring pathogens.
- Trim off the brown tips following the natural curve of the leaf tip. This produces a more natural appearance than a straight horizontal cut.
- Leave a tiny margin (one to two millimeters) of brown tissue so you do not cut into healthy green tissue.
- Do not remove leaves that are more than half still healthy. They continue to photosynthesize and support the plant.
This improves the plant’s appearance while you focus on fixing the root cause.
What to expect after trimming:
- New leaves will emerge healthy if the underlying issue is resolved
- Existing leaves will not regenerate browned portions
- Your plant may focus energy on new growth rather than damaged leaves
- Regular trimming encourages bushier, healthier growth over time
Seasonal Prevention Calendar
Different seasons bring different risks for crispy leaves. Crispy leaves aren’t always a watering problem. Sometimes the pot itself is the issue. A glazed ceramic pot without drainage can trap moisture and cause root stress that shows up as crispy leaf edges. Our Best ceramic pots to prevent crispy leaves and root stress guide helps you avoid this. Here is a year-round prevention guide:

Winter (Heating Season):
- Risk: Low humidity from central heating
- Action: Run a humidifier daily
- Action: Move plants away from radiators
- Action: Check humidity levels weekly with a hygrometer
Spring (Growth Season):
- Risk: Sun angle changes cause sudden scorch
- Action: Gradually move plants closer to windows
- Action: Begin fertilizing at half-strength
- Action: Repot if rootbound
Summer (Heat Season):
- Risk: Heat stress and rapid drying
- Action: Water more frequently
- Action: Provide shade during peak afternoon sun
- Action: Increase ventilation to prevent fungal issues
Fall (Transition Season):
- Risk: Temperature fluctuations and reduced light. Learn about ideal temperature in this guide.
- Action: Reduce watering as growth slows
- Action: Clean leaves to maximize light absorption
- Action: Prepare for winter by relocating plants before heating turns on
Quick Recap: Your Action Plan
- Look at the damage pattern (tips, whole leaf, center patches, or wet soil)
- Match it to the killer (dry air, underwatering, sun scorch, overwatering, or salt buildup)
- Apply the specific fix for that cause
- Wait for new growth. Damaged leaves will not heal, but new ones will be healthy if you fix the problem.
Emergency checklist:
- □ Check soil moisture at 2-3 inches depth
- □ Inspect roots for rot or dryness
- □ Evaluate light exposure and adjust plant position
- □ Test humidity levels with a hygrometer
- □ Inspect for white crust indicating salt buildup
- □ Trim damaged leaves with clean scissors
- □ Adjust watering frequency based on season
- □ Consider switching to filtered or distilled water for sensitive species
Frequently Asked Questions
Why are only the new leaves browning?
Fluoride damage often appears on the newest growth first, particularly in Dracaenas, Calatheas, and Spider Plants. New growth browning before it fully unfurls is usually a sign of low humidity, physical damage during the unfurling process, or inadequate moisture.
Can I use tap water if I let it sit overnight?
This removes chlorine but not fluoride. For plants sensitive to fluoride, you still need distilled or rainwater.
What are the most humidity-sensitive plants?
Calatheas, Ferns, Maidenhair Ferns, and Anthuriums are most prone to crispy tips in dry air. Sansevierias, ZZ Plants, and succulents are the most tolerant.
How often should I water my houseplants?
There is no one-size-fits-all answer. Check the top two to three inches of soil. If it feels dry, water. If it feels moist, wait a few more days. Seasonal changes, pot size, and plant type all affect frequency.
Can I save a plant with severe root rot?
If more than half the roots are mushy and brown, propagation may be your best option. Remove healthy cuttings and root them in water or fresh soil. If less than half the roots are affected, trim the damaged ones, repot in fresh soil, and adjust watering habits.
Why do my plant leaves have brown spots with yellow halos?
This often indicates a fungal or bacterial infection rather than environmental stress. Remove affected leaves, improve airflow, and consider a fungicide if the problem persists.
Is misting leaves helpful or harmful?
Misting increases humidity temporarily but can encourage fungal diseases if leaves stay wet for extended periods. A humidifier or pebble tray is more effective and safer for long-term humidity management.
Should I fertilize a plant with crispy leaves?
No. Fertilizing a stressed plant can worsen salt buildup and burn roots. First, fix the underlying environmental issue. Once you see new, healthy growth, resume fertilizing at half-strength.
Why is my plant getting brown tips despite good watering?
Check for rootbound conditions. If the plant is severely potbound, there is little room for water, and the leaf tips dry out. Also consider humidity, tap water quality, and fertilizer buildup.
References and Further Reading
The information in this article is based on expert guidance from horticulturists, plant care specialists, and publicly available search documentation from Google. Always observe your specific plant’s response to care adjustments, as individual conditions may vary.
Recommended tools for plant care:
- Digital hygrometer for humidity monitoring
- Moisture meter for accurate soil readings
- Clean pruning shears for trimming damaged leaves
- Distilled or rainwater for sensitive species
- Well-draining potting mix with perlite or orchid bark