Table of Contents
Quick Summary:
Root rot is a destructive condition caused by fungi and fungus-like organisms that thrive in wet, poorly drained soil. It attacks stressed or weakened plants, turning healthy white roots into brown, mushy, foul-smelling messes. Root rot is one of many problems that can affect houseplants. How to Diagnose Indoor Plant Problems walks you through identifying whether your plant’s issue is root-related, pest-related, or something else entirely. You can save a plant if you catch it early-remove it from the pot, trim away all rotted roots with sterilized shears, disinfect the remaining roots in a diluted hydrogen peroxide solution (1 part 3% peroxide to 2 parts water), and repot in fresh, well-aerated potting mix with plenty of perlite. But prevention is always better than cure: water based on need, not schedule, choose the right pot size, and use a chunky, fast-draining soil mix. A moisture meter can help you prevent root rot by taking the guesswork out of watering.
My Story
A few years back, I nearly killed a beautiful Monstera I’d raised from a tiny cutting. The leaves turned yellow, then brown. I kept watering it, thinking it was thirsty. When I finally pulled it from the pot, the roots were dark, mushy, and stank like a swamp. I nearly threw it out. Instead, I performed “root surgery”-cut away the rot, soaked the survivors in peroxide, and repotted in fresh mix. That plant is now six feet tall. I learned that day: wilting doesn’t always mean thirsty.
Introduction: The Silent Killer of Houseplants
You know the feeling. You walk past your favorite houseplant one morning and notice something’s off. The leaves are drooping. Some are turning yellow. Maybe a few have already fallen to the floor.
Your first instinct? Grab the watering can.
That instinct, more often than not, is exactly what kills the plant.
Here’s the brutal truth: root rot is the most common killer of indoor plants. Some estimates suggest it accounts for a significant portion of houseplant deaths. And the cruelest part? The symptoms look almost identical to underwatering. Your plant wilts and droops because its roots are so damaged they can no longer take up water-even though the soil is soaked. Read why is my houseplant dying guide to know the symptoms and fixes.
The damage happens underground, out of sight. By the time you see trouble above the soil, the roots may already be in serious trouble.
But here’s the good news: root rot is preventable. And in many cases, it’s treatable. This guide will teach you exactly how to spot it, stop it, and keep it from ever coming back.
What Is Root Rot? The Science Behind the Rot
Root rot isn’t one single disease. It’s a general term that describes any condition where pathogens cause the deterioration of a plant’s root system. Most plants are susceptible-both woody and herbaceous ornamentals.
The Oxygen Factor
Healthy roots need oxygen to respire, just like you and me. When soil stays constantly saturated, water fills all the air pockets between soil particles. The roots suffocate.
This is where things get dangerous. Stressed, oxygen-deprived roots are weak. They can’t defend themselves. And that’s when the pathogens move in.
Critical Distinction: Root Rot Is Not Always a Disease
Here’s something most articles get wrong: root rot itself is not necessarily a disease. As researchers at the University of Florida’s Emerging Pathogens Institute explain, it’s a physical condition that may be caused by a pathogen-or simply by a plant standing in water for too long.
The soil may develop a sour, stinky smell as oxygen-less conditions encourage anaerobic bacteria to grow. But these bacteria aren’t necessarily pathogens-they simply prefer wet soil conditions and happen to produce an unpleasant smell.
Understanding this distinction matters because it changes how you think about treatment. You’re not just fighting a pathogen-you’re fixing an environment.
The Pathogen Gallery
Several soil-borne fungi and fungus-like organisms cause root rots. According to plant pathologists at the University of Wisconsin and University of Maryland Extension, the most common culprits are:
| Pathogen | Key Symptoms | What to Look For |
|---|---|---|
| Pythium spp. | Stunting, yellowing, wilting even when moisture is adequate | Roots are brown to black and soft or mushy. The outer root layer easily pulls away, leaving a fine hair-like thread |
| Phytophthora spp. | Wilting despite adequate moisture; lower stem rot | Root tips turn dark brown and rapidly become soft and mushy. Lower stems may turn black or brown |
| Rhizoctonia solani | Thrives in warm, moist conditions | Coarse reddish-brown threads resembling spider webs over infected stems and roots |
| Fusarium spp. | Wilting, root decay | A common soil-borne fungus causing both root and stem rots |
Most of these pathogens have wide host ranges, meaning they can attack a wide variety of plants. They also prefer wet soil conditions. Some, like Pythium and Phytophthora, produce spores that can survive for long periods in soil or plant debris.
How to Identify Root Rot: A Two-Pronged Diagnosis
The key to saving a plant is catching root rot early. Here’s a systematic approach to diagnosis.
Above-Ground Symptoms: The Red Flags
Root rot sends distress signals above the soil long before you see the roots. Watch for:
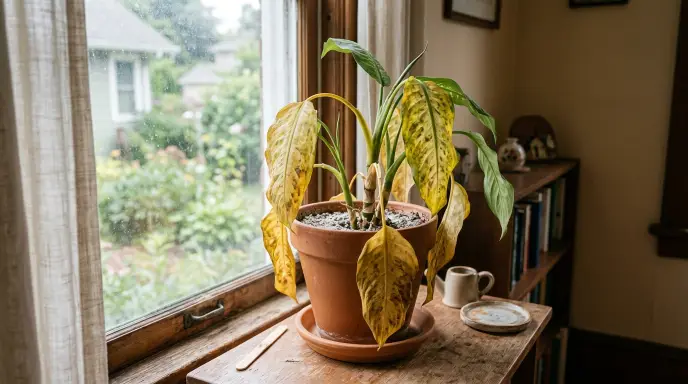
- Wilting despite wet soil: This is the #1 paradox and the most telling sign. The plant looks thirsty even though the soil is soaked. People often mistake this for underwatering and water more-which only makes things worse.
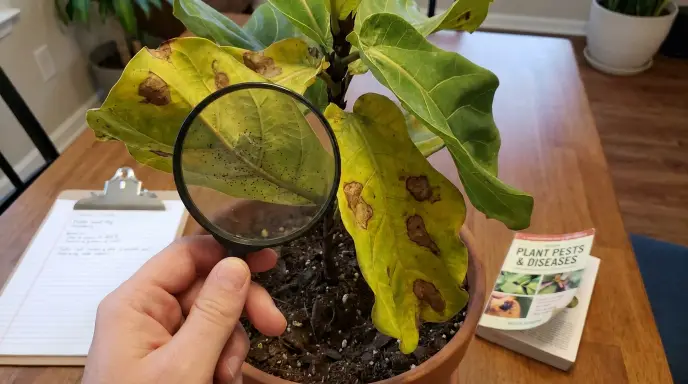
- Yellowing or browning leaves: Often starting with the lower, older leaves. The plant may look like it has a nutrient deficiency. Read our crispy leaves guide.
- Leaf drop: Leaves fall off even when the plant seems to be getting “enough” water.
- Stunted growth: The plant stops growing or grows very slowly.
- Mushy stems: The base of the plant or stems become soft, black, or mushy. This indicates the rot has spread from the roots to the crown.
A word of caution:
Yellow leaves are to houseplants what coughing is to humans-they can mean many different things. Don’t jump to conclusions. Investigate.
Below-Ground Symptoms: The Confirmation
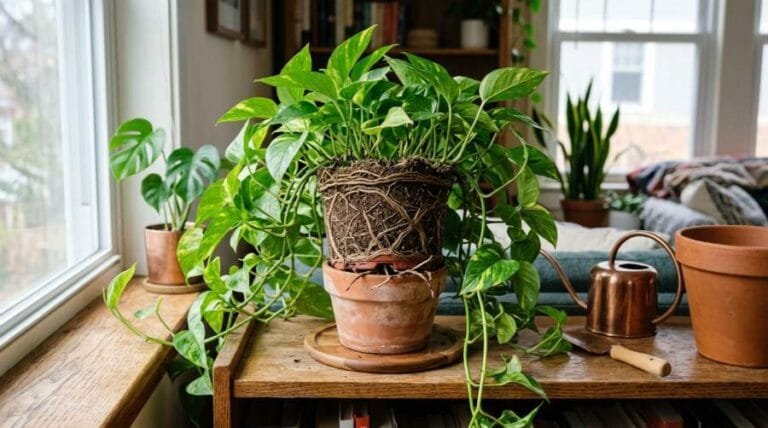
The only way to know for sure is to look at the roots.
Step 1: Unpot the plant:
Gently remove it from its pot. If it’s stuck, tap the sides or run a knife around the edge.
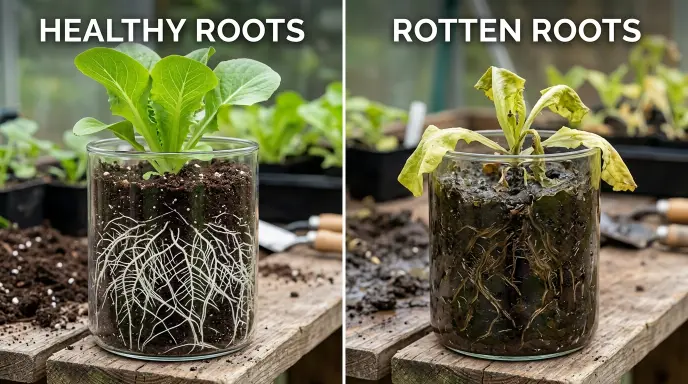
Step 2: The smell test:
A foul, swampy, or rotting odor is a dead giveaway. Sour or swampy-smelling soil. That’s anaerobic decay, and it usually means root rot is running alongside the gnats.
Step 3: Inspect the roots:
| Healthy Roots | Rotted Roots |
|---|---|
| Firm and flexible | Soft and mushy |
| White or light tan | Dark brown, reddish, or black |
| No odor | Foul, swampy smell |
| Hold together when pulled | Easily fall apart, leaving a stringy core |
As the Chicago Botanic Garden puts it: “Healthy roots are firm and white; infected or rotten roots are soft, darkened and often produce an unpleasant odor.”
How to Treat Root Rot: The “Plant CPR” Protocol
If you’ve confirmed root rot, act fast. Here’s the step-by-step rescue plan.
Step 1: Stop Watering Immediately
The first thing to do is simple: stop watering. Empty any water sitting in the saucer or decorative cover pot. If the compost is only slightly damp, giving it time to dry may be all the plant needs.
Step 2: Evacuate and Triage
Remove the plant from its pot and gently shake off as much of the old, contaminated soil as possible. Do not reuse this soil-it likely contains root rot fungi.
Step 3: The Root Wash
Gently wash the remaining soil from the roots under lukewarm, running water. This gives you a clear view of the damage. Root rot and sunburn can look similar. If you’re unsure, check our sunburn guide to rule out light damage first.
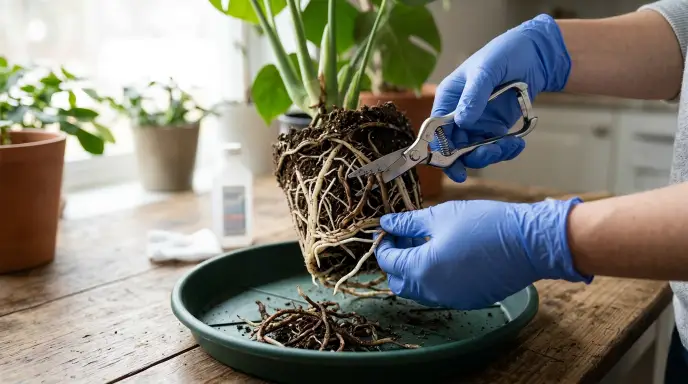
Step 4: The “Surgery” (Pruning)
Using sterilized, sharp scissors or pruning shears-cleaned with rubbing alcohol-carefully cut away all the soft, dark, mushy roots. Cut back to where the root tissue is firm and white. If even a tiny bit of rot remains, it will spread.
Pro tip: Clean your shears between cuts to avoid spreading pathogens.
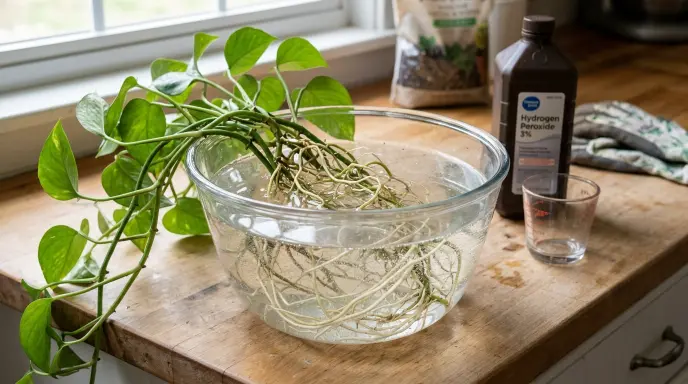
Step 5: Disinfection (The “Antibiotic” Treatment)
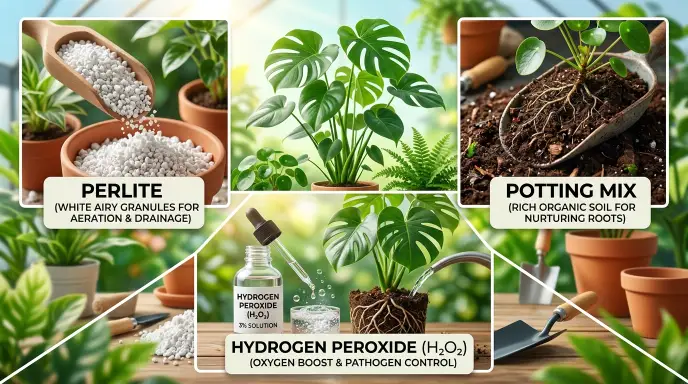
Soak the remaining healthy roots in a diluted hydrogen peroxide solution to kill lingering pathogens.
The recommended ratio: Mix 1 part 3% hydrogen peroxide with 2 parts water. Soak the roots for 10 to 20 minutes.
| Source | Ratio Recommendation |
|---|---|
| Apartment Therapy | 1 part peroxide: 2 parts water |
| Greg (plant app) | 1 part peroxide: 4 parts water (spray) |
| 9Now / Nine | 1 part peroxide : 2 parts water |
| Martha Stewart | 1:1 solution (spray) |
Our recommendation:
1:2 (peroxide: water) for soaking. 1:4 for spraying. Never use undiluted peroxide-it will damage the roots.
Alternative:
Some growers use a strong chamomile tea rinse, which has mild antifungal properties. Cinnamon dusting is another natural method.
Step 6: Prune the Foliage
To reduce stress on the now-smaller root system, prune back some of the top growth-leaves and stems-by about one-third. This balances the plant’s ability to take up water with its reduced root mass.
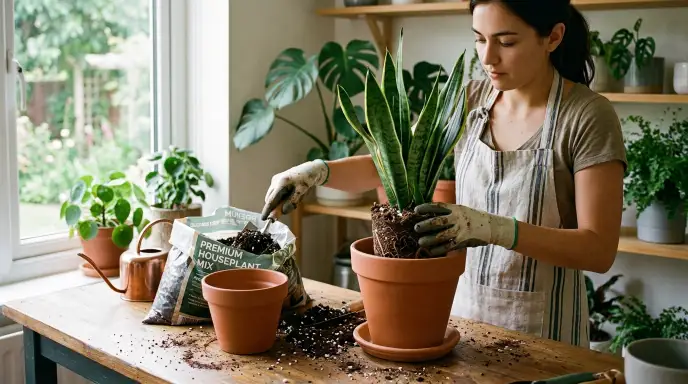
Step 7: The “New Home” (Repotting)
This step is critical:
- Use a clean pot with drainage holes.
- Do not reuse old soil. Read how to add perlite to potting soil to know the mixing process.
- Do not put rocks or gravel at the bottom of the pot. This is a common myth that actually inhibits drainage.
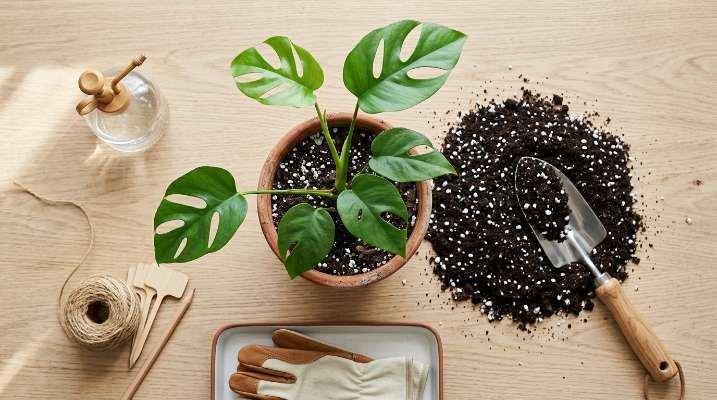
- Use fresh, well-aerated potting mix with plenty of perlite or orchid bark.
- Choose the right pot size: Only go slightly larger than the remaining rootball. A pot that is far too large will hold more moisture around the roots and can make the problem worse.
- Do not reuse plastic pots if possible-they’re difficult to disinfect adequately. Clay pots can be disinfected with a 10% bleach or detergent solution.
Step 8: The “Recovery Room” (Post-Treatment Care)
- Water sparingly. Only water when the top few inches of soil are dry.
- Do not fertilize immediately. The roots are fragile and can be burned by fertilizer. Read our increase humidity without a humidifier guide.
- Place the plant in bright, indirect light with good air circulation. Know how to measure light for indoor plants in this guide.
- Avoid harsh direct sunlight while the roots are damaged, as the plant may not be able to take up enough water to support its leaves.
The 50% Rule: When to Give Up
The Chicago Botanic Garden provides a clear guideline: If more than 50 percent of the roots are damaged, you might consider discarding the plant.
The University of Wisconsin Plant Disease Diagnostics Clinic puts it even more bluntly: “Often the best and most cost-effective way of dealing with a plant with root rot is to throw it out.”
| Damage Level | Recommended Action |
|---|---|
| Less than 50% roots damaged | Trim, disinfect, repot-good chance of recovery |
| 50-90% roots damaged | Low chance of survival. Consider propagation instead |
| More than 90% roots damaged | Discard the plant |
| Rot reached the crown (mushy stems) | Discard the plant |
| Bacterial infection | Discard the plant. Cannot be sprayed or pruned out |
How to Prevent Root Rot: Building a Rot-Proof Environment
Prevention is always better than cure. Here’s how to create an environment where root rot can never take hold.
Master the Art of Watering
- Don’t water on a schedule. Water based on the plant’s needs, not the day of the week.
- The finger test: Stick your finger 1-2 inches into the soil. If it feels dry, it’s time to water. If it feels moist, wait.
- The weight test: Pick up your plant and check the weight. A dry plant is a lot lighter than a wet plant. Over time, you should be able to develop a good sense of how light your plant should feel when it’s time to water.
- Moisture meters: Some people like to use a moisture meter. But take care- moisture meters can malfunction and may not be calibrated for the type of plants you have.
- Water deeply but infrequently. When you water, water thoroughly until it runs out of the drainage holes. Then allow the soil to dry out slightly before the next watering. Best long-spout watering cans help in this situation.
- Empty the saucer. Never let your plant sit in standing water.
- Adjust for winter. In the shorter days of autumn and winter, plants get less light and grow slower, so they use less water than in spring and summer.
Preventing root rot starts with choosing the right pot. Ceramic pots with proper drainage and the right glaze type for your plant’s water needs make a huge difference. See our best ceramic pots for preventing root rot in houseplants.
Choose the Right Potting Mix
This is your single best defense against root rot.
- Use a well-drained, soilless potting mix: Garden soil is too heavy and often contains root rot fungi. Read this article to learn about the best potting soil.
- Add amendments for aeration: Perlite creates permanent air pockets throughout the soil, allowing oxygen to reach the roots. Orchid bark also improves drainage and aeration. “A handful of sand, perlite, or bark will go a long way in facilitating aeration and drainage,” says plant expert Kiersten Rankel.
- Do not compact the soil when potting up a houseplant. “Do not compact the soil as this will lead to a lack of airflow and decreased drainage,” warns Anna Ohler, owner of Bright Lane Gardens nursery.
- What to look for: A good mix should have coarse particles that create channels for water to move through freely, keeping roots moist without becoming waterlogged.
Choose the Right Pot
- Drainage holes are non-negotiable.
- Pot size matters: Go up only one pot size-no more than 1 to 2 inches larger in diameter. A pot that’s too large holds too much soil, which stays wet too long.
- Material matters: Terracotta pots (clay pots) typically allow the potting mix to dry out faster than plastic or ceramic pots because moisture evaporates from the sides of the pot, not just the top.
- Skip the rocks: As mentioned earlier, rocks or gravel at the bottom actually hinder drainage.
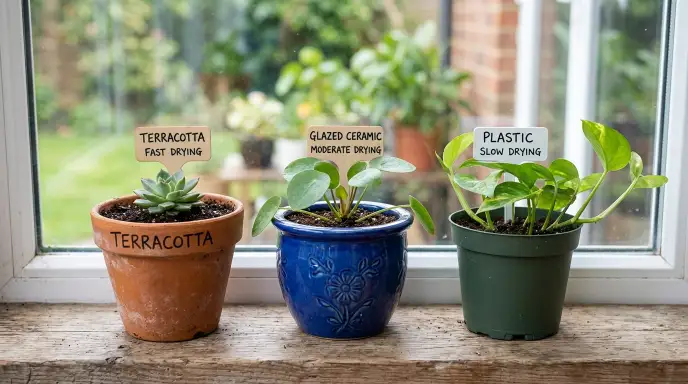
| Pot Material | Drying Speed | Best For |
|---|---|---|
| Terracotta / Clay | Fastest | Plants prone to overwatering |
| Ceramic (glazed) | Slow | Plants that like consistent moisture |
| Plastic | Slowest | Plants that prefer staying moist |
Environmental Factors
- Air circulation: Good airflow helps soil dry out. A small fan in the room can help. Want to protect plants from summer heat? Read our summer plant care tips.
- Light: Plants in low light use less water, so soil stays wet longer. Know how much light plants need. Match your plant to appropriate light conditions. Want to know pebble tray works or not? Read our Do pebble trays actually work guide. Also read best humidifiers for houseplants.
- Temperature: Cooler temperatures slow down water uptake. If conditions are too cool for the plant to use moisture quickly, the soil stays wet longer. Read best digital hygrometer for monitoring humidity.
Quarantine New Plants
- Always inspect new plants for signs of root rot before placing them near your other plants.
- Buy plants from a reputable source and make sure they are root rot-free prior to purchase.
- Consider keeping new plants in a separate area for a few weeks as a quarantine period.
Sanitation
- Do not reuse potting mix from your houseplants.
- Do not reuse water that has drained from your plants.
- Disinfect tools after working with plants that have root rot problems.
- Disinfect clay pots with a 10% bleach or detergent solution, or alcohol.
- Do not reuse plastic pots as they are often difficult to disinfect adequately.
Susceptible Plants and Special Cases
Some plants are more prone to root rot than others. Plants that have already been weakened by low light and leggy growth are more vulnerable to root rot. Learn how to fix leggy growth here.
The “Thirsty but Sensitive” Group (Peace Lilies, Ferns, Pothos)
These plants like consistent moisture but can still get root rot if the soil is too dense or if they sit in water. They need good drainage despite their preference for moisture.
The “Drought-Tolerant” Group (Succulents, Cacti, Snake Plants)
These are highly susceptible to root rot. They store water in their leaves and stems, and their roots are adapted to dry conditions. They need a very gritty, fast-draining mix with high perlite content.
The “High-Risk” Group (Monsteras, Alocasias)
These are prone to root rot if overwatered or planted in a heavy mix. They benefit from chunky, aerated soil with orchid bark and perlite.
Durable Plants That Tolerate Some Abuse
According to the N.C. Cooperative Extension, some of the most durable houseplants include:
- Snake plant (Sansevieria)
- Heart-leaf philodendron
- Golden pothos
- Corn plant
- Janet Craig Dracaena
- Baby rubber plant
- Spider plant
Know about high-light indoor plants in this guide.
Bacterial and Viral Infections
Dr. Carrie Harmon of the University of Florida notes that bacterial diseases are actually quite rare in houseplants. If someone encounters a bacterial infection, it is usually because the plant was already infected when they brought it home from the nursery.
Key symptoms of bacterial infection:
- Areas that look dark, black, and wet, with angular borders
- Water-soaked and mushy appearance
- Most likely to affect fleshy plants like orchids and succulents
Harmon’s advice: “Just throw it out. Start over. There isn’t anything you can spray it with, and you can’t prune it out.”
When to Say Goodbye: The Hard Truth
Sometimes, despite your best efforts, a plant is beyond saving.
The 90 percent rule: If more than 90 percent of the root system is rotted, the chances of survival are very low.
Systemic infection: If the rot has reached the crown (the base of the plant) and the stems are mushy, the plant is likely gone.
The propagation loophole: If the plant is severely infected but there’s a healthy stem or leaf, you may be able to take a cutting and propagate a new plant. This allows the “parent plant” to live on.
As Dr. Carrie Harmon of the University of Florida puts it: “If someone encounters a bacterial infection, just throw it out. Start over. There isn’t anything you can spray it with, and you can’t prune it out.”
Root Rot vs. Underwatering: A Diagnostic Flowchart
Wilting and yellowing are symptoms of both overwatering (root rot) and underwatering. Here’s how to tell them apart:
| Symptom | Root Rot (Overwatering) | Underwatering |
|---|---|---|
| Soil moisture | Wet, soggy | Dry, pulling away from pot |
| Leaf texture | Soft, droopy, yellow | Crispy, brown edges, droopy |
| Root appearance | Brown/black, mushy, foul smell | Firm, white or tan, dry |
| Stem condition | Soft, mushy near base | Brittle, crisp |
| Pot weight | Heavy | Very light |
| Response to watering | Gets worse | Improves within hours |
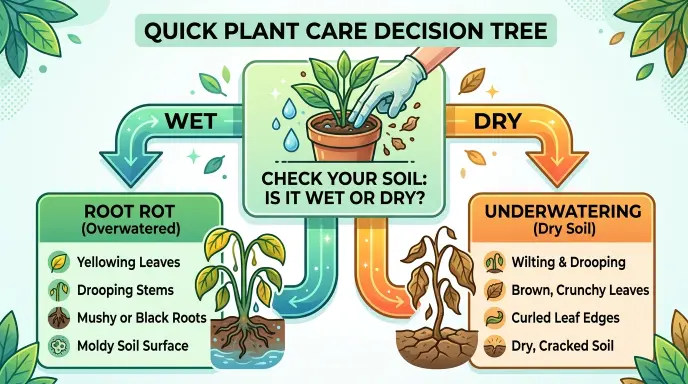
The decision tree:
- Stick your finger in the soil.
- If it’s dry and crumbly -> water the poor thing.
- If it’s wet and soggy -> gently pull the plant out of the pot and look at the roots.
- If roots are white -> not root rot. If roots are brown or black -> root rot confirmed.
Fungus Gnats: The Connection Most Articles Miss
Here’s something most guides leave out: fungus gnats are both a symptom and a spreader of root rot.
Fungus gnats are attracted to consistently wet potting mixes and decaying plant matter. They can spread root rot pathogens from plant to plant.
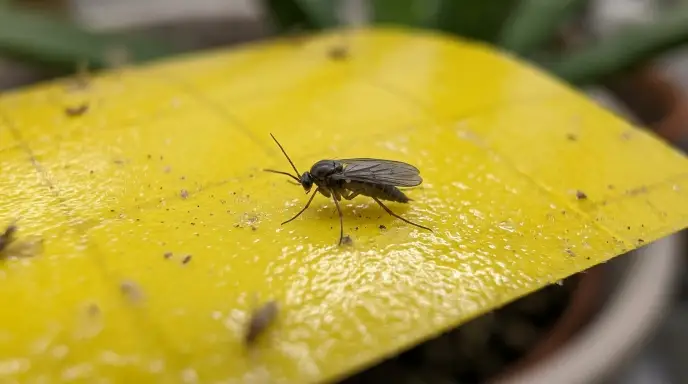
What to look for:
- Small black flies hovering around your plants
- Larvae in the soil (tiny white worms with black heads)
What to do:
- Let the soil dry out more between waterings (this breaks the gnat life cycle)
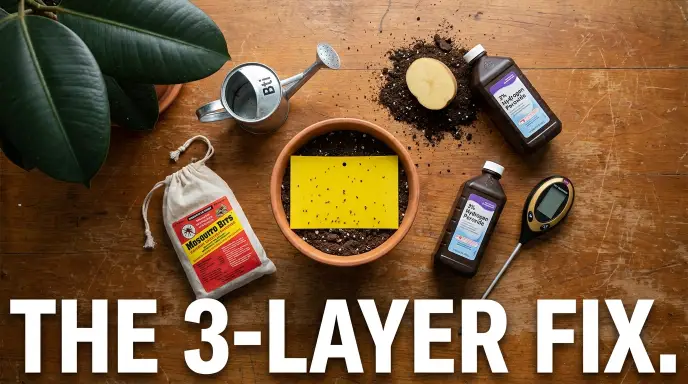
- Use yellow sticky traps to catch adult gnats
- Consider using beneficial nematodes or BTI (Bacillus thuringiensis israelensis) for severe infestations
How Long Does Recovery Take?
There is no set timeline:
| Severity | Recovery Time | What to Expect |
|---|---|---|
| Mild overwatering | A few days | Plant perks up once conditions improve |
| Moderate root rot | Several weeks | Yellow leaves may continue to drop |
| Severe root rot | Months (if at all) | Watch for healthy new growth |
Don’t panic:
If it looks a little worse before it looks better. Yellow leaves may continue to drop after you have corrected the problem, particularly if the roots were damaged.
The most encouraging sign:
Is not necessarily a prettier plant straight away, but healthy new growth appearing once the root system has had time to recover.
Frequently Asked Questions
Can I reuse potting soil that had root rot?
No. Do not reuse potting mix from plants with root rot. It likely contains root rot fungi.
How long does it take for a plant to recover from root rot?
Recovery time varies. Mild cases: a few days. Moderate root rot: several weeks. Be patient and avoid overwatering during recovery.
Is hydrogen peroxide safe for plants?
Yes, when properly diluted. Use 3% hydrogen peroxide mixed with water at a 1:2 ratio (1 part peroxide to 2 parts water). Never use undiluted peroxide-it will damage the roots.
Can root rot spread to other plants?
Yes. Root rot fungi can spread through contaminated soil, water, or tools. Always quarantine infected plants and sanitize your tools.
Do all yellow leaves mean root rot?
No. Yellow leaves can indicate many issues: underwatering, nutrient deficiency, pests, or simply old age. Investigate before assuming root rot.
Can I use cinnamon as a natural fungicide for root rot?
Some growers use cinnamon as a mild antifungal. While it may have some benefit, it’s not a substitute for proper treatment-pruning rotten roots and improving drainage are far more effective.
Why shouldn’t I put rocks at the bottom of my pot?
Rocks or gravel at the bottom actually create a “perched water table” that keeps the soil above it saturated. This makes root rot more likely, not less.
What’s the difference between overwatering and root rot?
Overwatering is the cause; root rot is the result. Overwatering creates the conditions (oxygen deprivation) that allow rot to develop.
Can I save a plant with mushy stems?
Usually not. If the rot has reached the crown (the base of the plant) and the stems are mushy, the plant is likely gone.
Should I fertilize a plant recovering from root rot?
No. Do not fertilize a stressed or recently repotted plant. Fertilizer will not fix damaged roots, and feeding while the root system is struggling can cause further stress.
Conclusion
Root rot is the most common killer of indoor plants-but it doesn’t have to be.
Key Takeaways
- Learn the signs: Wilting despite wet soil is the #1 red flag.
- Act fast: The sooner you catch it, the better the chances of survival.
- Perform “root surgery”: Remove the plant, trim all rotten roots, disinfect, and repot in fresh mix.
- Know when to give up: If more than 50% of roots are damaged, consider discarding the plant.
- Prevent, prevent, prevent: Water based on need, choose the right pot and soil, and create the right environment.
- Sanitize everything: Don’t reuse soil, water, or plastic pots.
- Bacterial infections are rare: If you have one, throw it out.
Root rot is preventable. And in many cases, it’s treatable. By understanding the science behind it and taking proactive steps, you can save your plants and become a more confident plant parent.
Your next step:
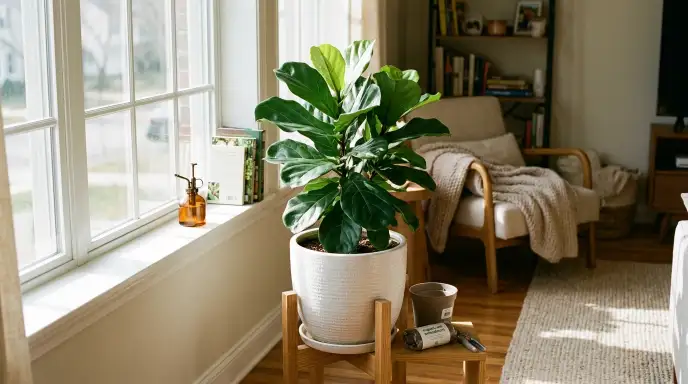
If you want to build the perfect foundation for your plants, check out our guide on making your own indoor potting mix and our detailed breakdown of perlite ratios for different plant types. The best time to prevent root rot is when you’re repotting your plant. Read our complete beginner’s guide to indoor plant care for details about plant care.