Something’s off with your houseplant, but figuring out why can feel like guesswork. That’s where learning how to diagnose indoor plant problems actually saves you time and plants.
Here’s the tricky part: pests, disease, and simple care mistakes often look almost identical. Yellow leaves, brown spots, and wilting can all point to completely different causes. Treat the wrong one, and you’re not just wasting effort. You could be making the real problem worse.
This guide walks you through the diagnostic process first. You’ll learn how to tell pests apart from disease and care issues, get a detailed rundown of the six most common indoor plant pests, and know exactly where to head next once you’ve narrowed down what’s really going on.
One quick note before we dive in: this is a diagnostic guide, not a full treatment encyclopedia. Pest identification gets the deepest coverage here, since that’s the piece most beginner resources skip over. For step-by-step treatment of specific issues like root rot, sunburn, or cold damage, I’ll point you to the dedicated guide for each one once you’ve confirmed what you’re dealing with.
Table of Contents
Is It a Pest? Start Here
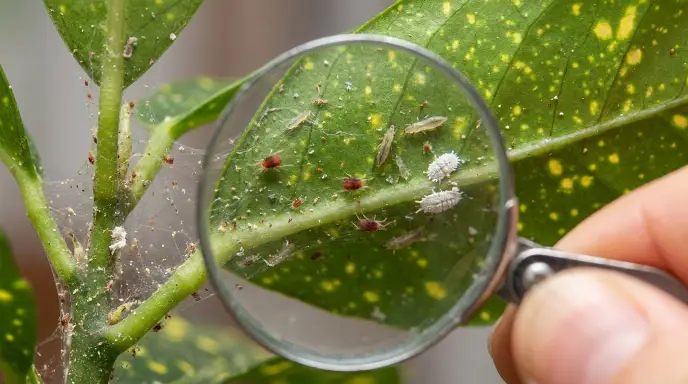
Before you inspect anything closely, run through this quick checklist. If you can check off any of these, you’re likely dealing with a pest rather than a disease or care issue:
- You can see something moving, even something tiny, when you look closely.
- There’s fine webbing between leaves or in leaf joints.
- Leaves feel sticky, or there’s a sticky film on the surface below the plant.
- You see small black specks (insect droppings, called frass) on or under leaves.
- Damage shows up first and worst on the newest growth.
- Tapping a leaf over white paper knocks something small and moving onto the page.
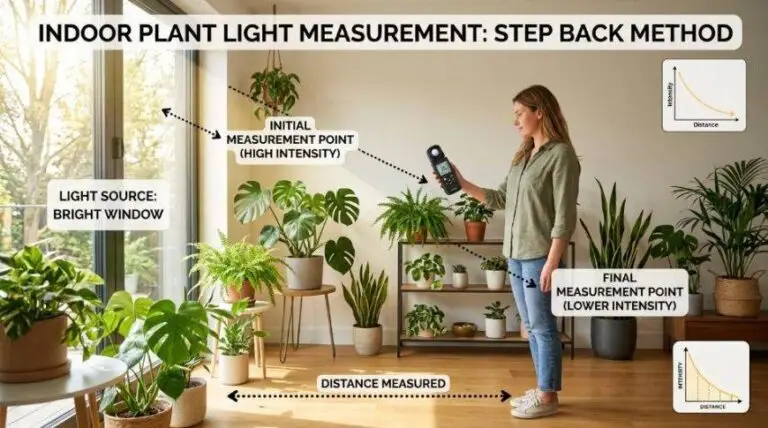
If none of these apply and you’re instead seeing wet, mushy tissue, spreading spots, or damage that started after a light or temperature change, you’re more likely looking at disease or environmental stress. Once you’ve identified the pest, the next step is choosing the right treatment. For a research-backed, commission-free guide to the products that actually work, see our complete guide to houseplant pest control products. Before you assume disease, rule out light problems first. What’s the Best Window Direction for Houseplants? and A Simple Guide to Identifying Your Room’s Light Level help you figure out if your plant is getting the right amount of light. For plants that need more, Grow Lights 101 covers artificial lighting options. Brown Spots on Leaves? Bacterial vs. Fungal vs. Sunburn and Why Is My Houseplant Dying? are better starting points for those. Spider mites are one of the most common; here’s how to spot them. Spider mites are one of the most common; here’s how to spot them and prevent them.
How to Inspect Your Plant for Pests
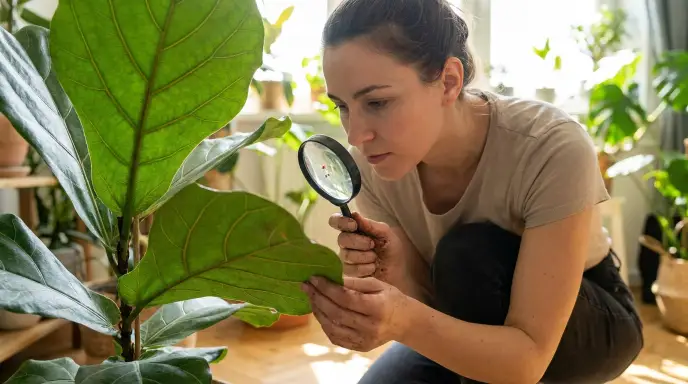
A proper five-minute inspection beats a five-second glance. Most pests hide in predictable spots, so check them in this order.
Leaves:
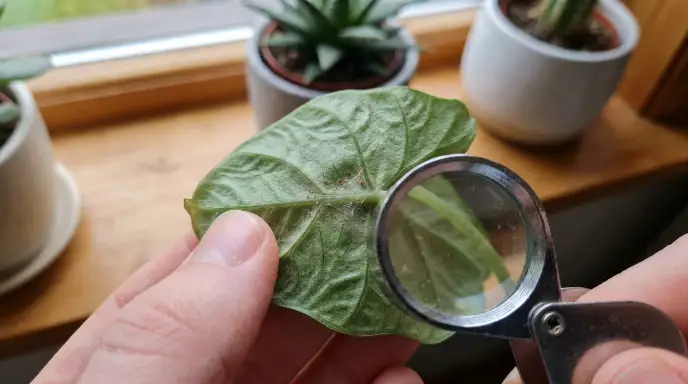
Look at the top surface first, then flip every leaf over, since many pests feed almost exclusively on the underside where they’re harder to spot. Pay close attention to new growth, since it’s usually the first place damage shows up, and check where leaves attach to the stem.
Stems and growing points:
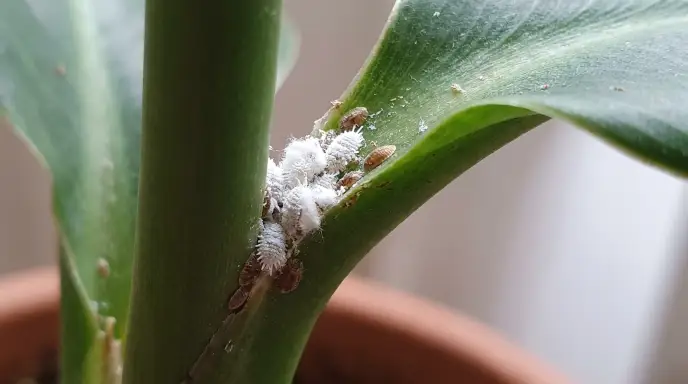
Run a finger along the stem, feeling for small bumps or raised spots. Check leaf joints specifically, since mealybugs and scale both like to hide there, and look for anything sticky or egg-like clustered near new growth.
Soil surface:
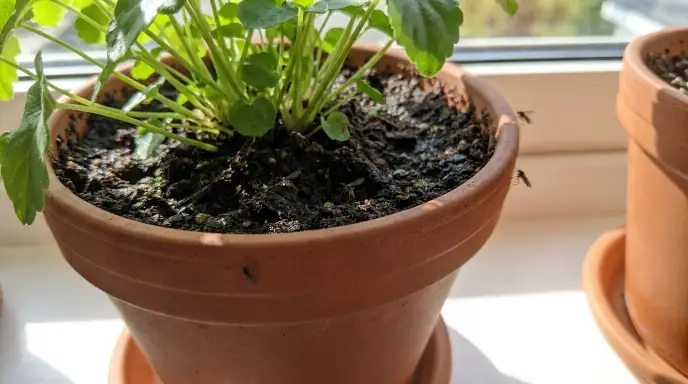
Disturb the top of the soil gently and watch for anything flying up or crawling. Fungus gnats in particular become obvious the moment you water or touch the soil.
Roots, when needed:
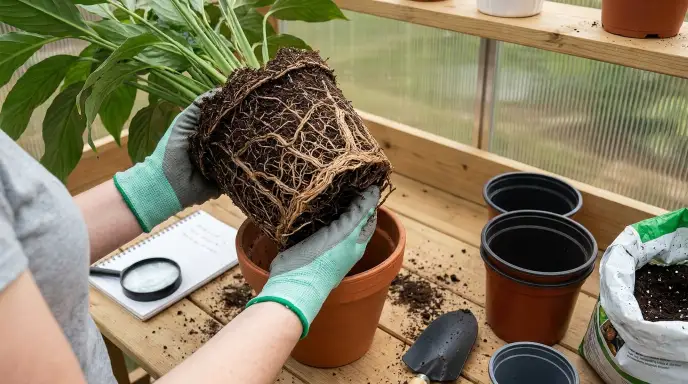
If a soil pest seems likely, or the plant is declining without visible above-soil symptoms, it’s worth gently removing the plant from its pot to check the root zone directly. If you’re repotting anyway to deal with a pest, How to Repot a Houseplant Without Killing It walks through doing that without adding stress. The pot you choose matters too. Best Ceramic Pots for Plants covers which glaze types and drainage features work best for different plants—helping you avoid root rot before it starts.
Simple tools that help:
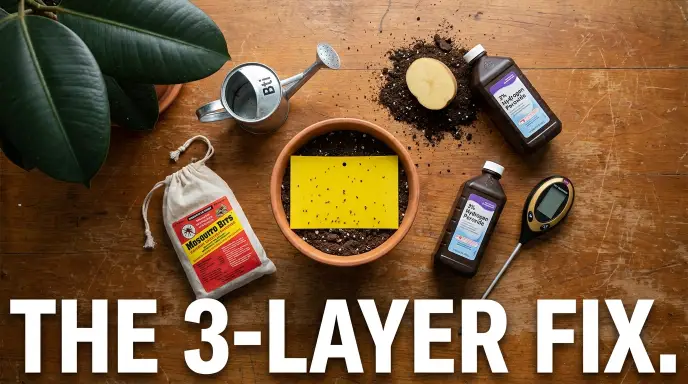
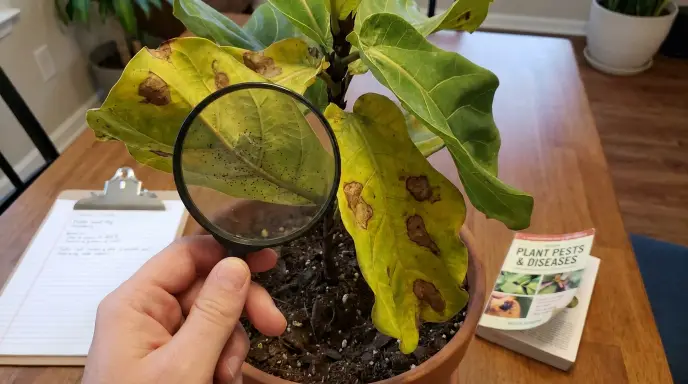
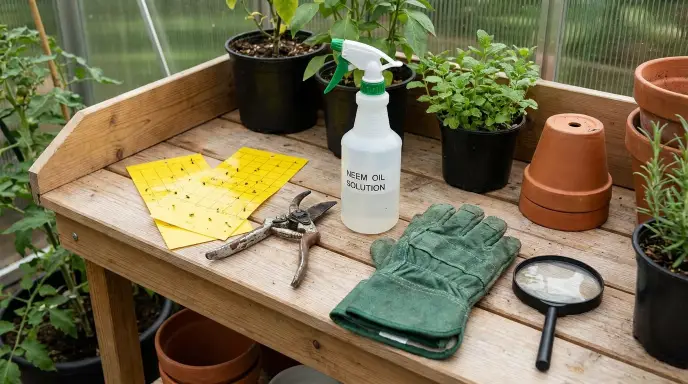
A magnifying glass or your phone’s macro camera mode, a sheet of white paper for tapping out small insects, and yellow sticky cards for monitoring flying pests over time. A soil moisture meter is also worth having, since several common pests, especially fungus gnats, are directly tied to how wet your soil stays.
The 6 Most Common Indoor Plant Pests
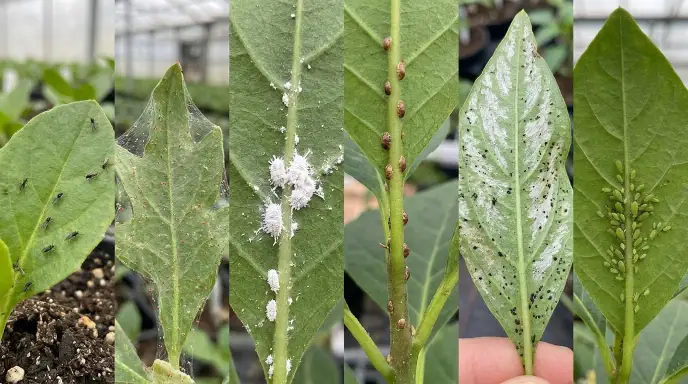
Fungus Gnats
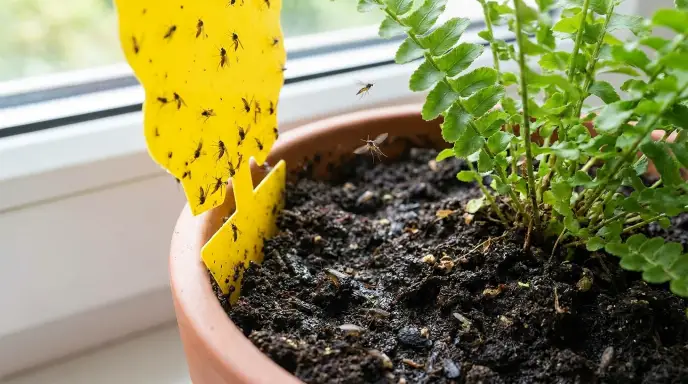
What you’ll see: Small black flies hovering near the soil or around windows, especially noticeable right after watering. Larvae live in the top layer of the soil. Read our how to identify fungus gnats and distinguish them from fruit flies and drain flies.
Why they show up: Fungus gnats need a consistently moist growing medium to breed. If your soil rarely gets a chance to dry out, you’re creating ideal conditions for them. If you struggle with consistent watering, Best Self-Watering Pots 2026 can help by delivering water only as the plant needs it—reducing the overwatering that attracts fungus gnats in the first place.
First step: Let the top one to two inches of soil dry out fully between waterings. This alone resolves most mild infestations, since it breaks the larvae’s life cycle. If you’re not sure your soil is actually drying out between waterings, How to Check Soil Moisture Without a Meter and How to Water Plants Correctly are worth reviewing, since watering habits are the root cause here more often than the pest itself. If your soil stays wet for too long even with proper watering, the problem may be your potting mix. Best Potting Soil for Indoor Plants helps you choose a well-draining mix, while How to Make Your Own Indoor Potting Mix lets you control drainage from the start. For existing soil that holds too much water, Perlite Ratio for Indoor Plants and How to Add Perlite to Potting Soil show you how to improve aeration and prevent fungus gnat breeding conditions.
Spider Mites
What you’ll see: Fine, pale stippling across the leaf surface and, in worse cases, delicate webbing between leaves or stems. They’re extremely small, so you may see the damage well before you see the mites themselves. Read our guides on spider mites to identify and prevent them.
Where to look: The underside of leaves, especially along the veins.
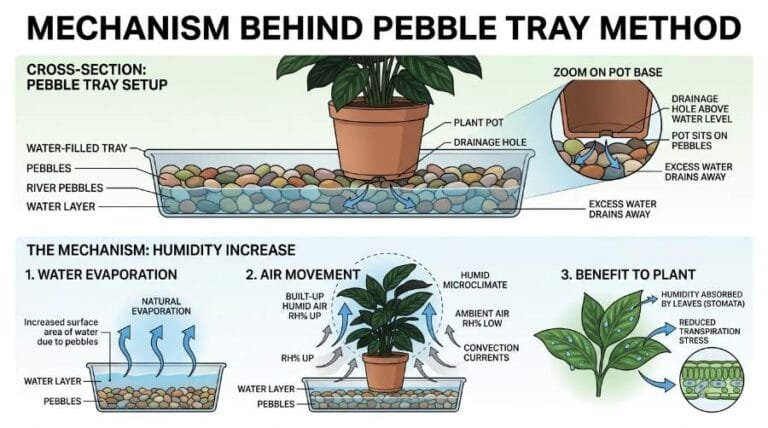
Why they show up: Spider mites tend to thrive in dry indoor air. If you’re already dealing with low humidity, that’s worth addressing alongside treatment. How to Increase Humidity for Indoor Plants covers practical ways to do that. To monitor your indoor humidity levels accurately, Best Digital Hygrometer 2026 helps you track moisture in the air so you can keep conditions unfavorable for spider mites.
First step: A thorough rinse under the sink or shower, focused on the undersides of leaves, followed by daily monitoring for a week or two to catch any survivors.
Mealybugs
What you’ll see: White, cottony clusters tucked into leaf joints, along stems, and sometimes on roots. They’re easy to miss at first glance since they can look like a bit of lint.
First step: Manual removal with a cotton swab dipped in isopropyl alcohol is the most reliable starting point for a mild infestation. Check weekly afterward, since mealybugs are notorious for reappearing from eggs missed the first time. For a full 6-week mealybug treatment schedule that breaks the life cycle completely, see our full 6-week mealybug treatment schedule.
Scale Insects
What you’ll see: Small, brown or tan, dome-shaped bumps stuck firmly to stems and the undersides of leaves. Unlike most pests, scale insects barely move, which is exactly why they’re often mistaken for a natural part of the plant until sticky residue gives them away.
First step: Physical removal (scraping gently with a fingernail or soft brush) for light infestations, followed by close monitoring, since scale can be one of the more persistent pests to fully clear.
Thrips
What you’ll see: Silvery, streaky scarring on leaves and distorted new growth. Look closely for tiny black specks of waste on the leaf surface, which is one of the more reliable ways to distinguish thrips damage from other stippling-type damage.
First step: Isolate the plant immediately, since thrips move between plants easily, and monitor closely, as they have multiple hidden life stages that make one-time treatment unreliable.
Aphids and Whiteflies
What you’ll see: Aphids cluster in soft-bodied groups, usually on new growth, and produce a sticky honeydew residue. Whiteflies look similar but are more mobile, fluttering up visibly when you disturb the leaves.
First step: A strong rinse to physically remove as many insects as possible, followed by repeat checks, since both pests reproduce quickly and a single treatment rarely fully resolves an established infestation.
Pest vs. Disease vs. Care Problem: Telling Them Apart
This is where most beginners get stuck, since several pest symptoms can look a lot like disease or a simple care mistake at first glance.
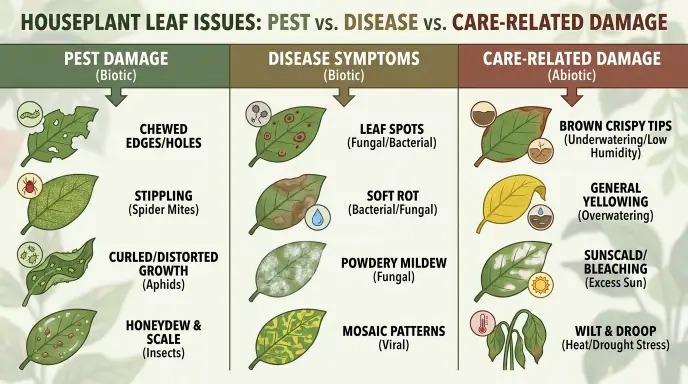
| What You See | Likely a Pest If… | Likely Disease If… | Likely Care/Environmental If… |
|---|---|---|---|
| Sticky leaves | You also see small insects or webbing | Tissue is also spotted or discolored | No insects visible, and it started after fertilizing |
| Yellowing leaves | Damage is concentrated near active pest clusters | Yellowing comes with spreading spots or lesions | Yellowing is even and affects older, lower leaves (overwatering vs. underwatering). Nutrient deficiencies can also cause yellowing, especially on older leaves. How to Fertilize Indoor Plants the Right Way and Fertilizing Indoor Plants: Beginner’s Guide walk you through feeding schedules and proper application. For troubleshooting, Common Fertilizer Mistakes and How to Fix Them covers what to avoid, and Best Time of Year to Fertilize Indoor Plants helps you time feedings correctly. |
| Brown, crispy edges | Damage follows a chewed or scarred pattern | Spots enlarge over several days | Even browning tied to dry air or watering (see why plant leaves get crispy) |
| Wilting | Combined with visible insects at the roots or stem base | Combined with soft, foul-smelling roots (root rot) | Soil is bone dry or waterlogged with no pests present |
| Bleached or scorched patches | Not typical of pest damage | Not typical of disease | Usually sunburn from direct sun exposure |
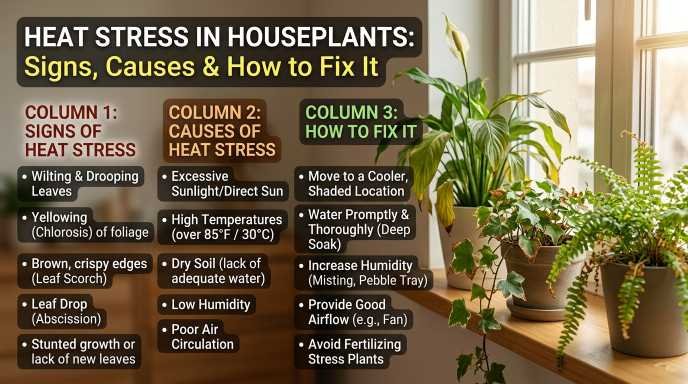
| Blackened, mushy leaf patches | Not typical of pest damage | Possible, especially with wet conditions | Often cold damage after exposure below 50°F |
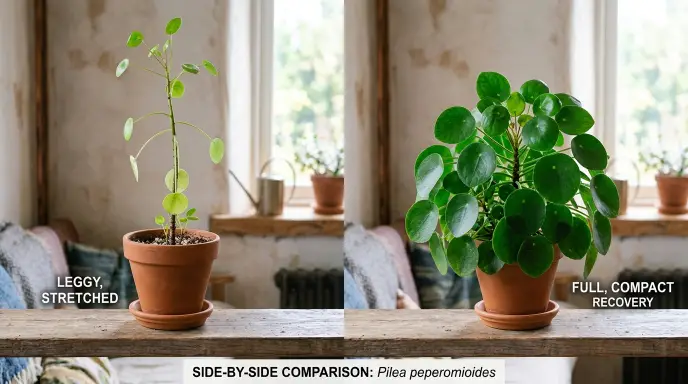
For more on matching your plant to the right light conditions, see High Light Indoor Plants That Thrive in Direct Sun and Bright Indirect Light Explained. If you check a plant carefully and genuinely see no insects, webbing, or frass anywhere, treat it as a care or disease issue first rather than reaching for a pesticide. Spraying a plant that has no pest problem doesn’t help, and it can add unnecessary stress. If your plant is stretching with long, bare stems between leaves, that’s a classic sign of insufficient light. Leggy Plant? 5 Reasons and How to Fix explains why it happens and what to do about it.
Treatment Comparison: Which Method Fits Your Pest?
| Method | Best Suited For | Advantage | Limitation |
|---|---|---|---|
| Manual removal | Mealybugs, scale, isolated pests | Low cost, targeted, no chemicals | Time-consuming on larger infestations |
| Water spray/rinse | Aphids, whiteflies, spider mites | Physically removes insects and dust | Won’t reach eggs or hidden life stages |
| Sticky traps | Fungus gnats, whiteflies (monitoring) | Easy to see what’s active | Only catches flying adults, not larvae or eggs |
| Insecticidal soap | Exposed, soft-bodied insects | Direct contact control | Needs thorough coverage and repeat applications |
| Horticultural oil | Scale, mealybugs, some mite stages | Can smother multiple life stages | Plant sensitivity varies; always check the product label |
| Bti (soil-applied) | Fungus gnat larvae specifically | Targets the larval stage in soil | Must be used exactly per the product label |
I’d flag this clearly: pesticide labeling, legal use requirements, and product availability vary by product and location, so check the label on whatever you’re considering rather than relying on general advice like this. I’m not recommending specific brands here, since I don’t have verified product data to draw from.
What to Do When You Confirm a Pest
1. Isolate the plant: Move it away from your other plants immediately and check neighboring plants for early signs of the same pest.
2. Identify before treating: Match what you’re seeing against the pest profiles above. Treating the wrong pest wastes time and doesn’t solve anything.
3. Correct any contributing care issue: For fungus gnats, that means adjusting your watering. For spider mites, that often means addressing low humidity. Treating the pest without fixing the underlying condition usually means it comes back.
4. Apply a targeted treatment: From the comparison table above, follow the product label exactly.
5. Monitor new growth, not old damage: Leaves that are already damaged typically won’t heal. Judge progress by whether new growth comes in clean and pest activity decreases over the following one to two weeks.
Prevention and Quarantine
New plants are the most common way pests enter a home. Inspect any new plant closely before buying if you can, and keep it separated from your existing collection for one to two weeks, rechecking the leaf undersides and soil partway through, since some pests aren’t visible right away.
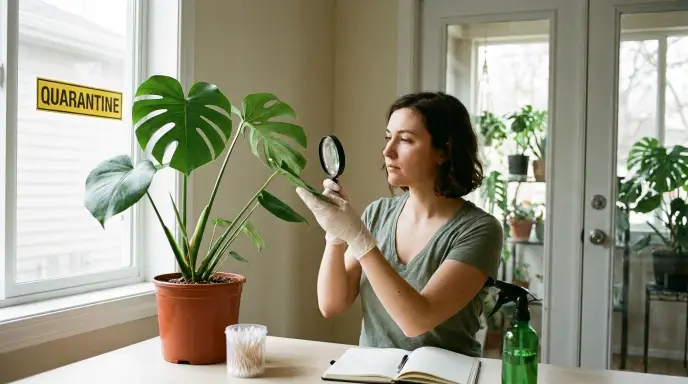
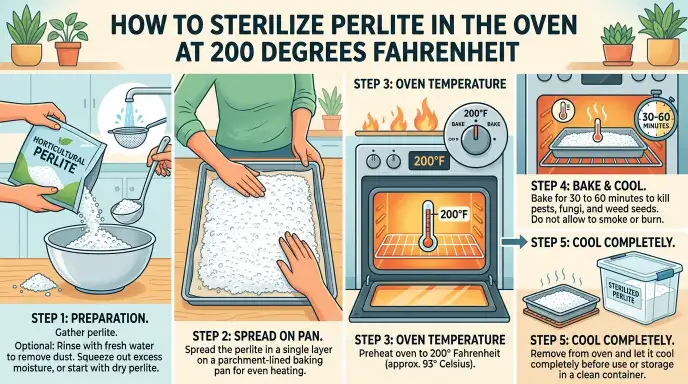
A short weekly routine also goes a long way: check new growth first, flip a few leaves to look underneath, glance at the soil surface, and note anything unusual. Not sure which soil amendment is right for your plant? Perlite vs Vermiculite and Perlite vs Pumice break down the differences. If you’re reusing potting mix, How to Sterilize Perlite shows you how to handle it safely. Since dry air and inconsistent watering both encourage specific pests (spider mites and fungus gnats especially), keeping your watering routine consistent and humidity reasonable does double duty as pest prevention. How to Water Houseplants the Right Way and How to Increase Humidity for Indoor Plants both support this directly.
Troubleshooting: Why the Pest Came Back
Eggs or larvae survived the first treatment:
Most pests need at least two to three treatments spaced according to their life cycle, not a single application.
A neighboring plant was left untreated:
If pests are present on even one nearby plant, they can easily reinfest a treated one.
The pest was misidentified:
Treating spider mites like fungus gnats (or vice versa) won’t work, since the effective methods differ. Go back through the identification section above if a treatment isn’t working.
A new plant reintroduced it:
This is exactly why quarantine matters, even for plants that look healthy at first glance.
Tools Worth Having
A magnifying glass or phone macro lens, white paper for tapping out insects, clean pruning shears, and yellow sticky traps cover most of what you need for ongoing pest monitoring. If you’re building out a fuller kit, 10 Best Indoor Gardening Tool Kits and Best Soil Moisture Meter for Indoor Plants cover the buying side of this in more depth than makes sense to repeat here.
Frequently Asked Questions
How can I tell if it’s a pest or a disease without expert help?
Look for movement, webbing, sticky residue, or black specks of waste first. If any of those are present, it’s very likely a pest. If instead you see spreading spots, soft or mushy tissue, or damage that started after a light or temperature change, disease or a care issue is more likely.
Can one product treat every houseplant pest?
No. Different pests respond to different treatments, and using the wrong one wastes time and can stress the plant unnecessarily. Identify the pest first using the profiles above.
How long should I quarantine a new plant?
At least one to two weeks is a reasonable general guideline, since some pests take time to become visible.
Why do pests keep coming back after I treat them?
Most commonly because eggs or larvae survived the first application, a nearby plant was left untreated, or the treatment wasn’t repeated on the schedule the pest’s life cycle actually requires.
Are these pests dangerous to people or pets?
Common houseplant pests like the ones covered here generally aren’t a health risk to people or pets, though I’d recommend checking with a vet if a pet has direct, repeated contact with a heavily infested plant, since I can’t verify species-specific risk here.
The Bottom Line
Most houseplant problems fall into one of three buckets: a pest, a disease, or something in the care routine. Once you know which bucket you’re in, the fix usually isn’t complicated; the hard part is just getting there. Run through the checklist at the top of this guide next time something looks off, take a close look at the leaf undersides and soil before you assume the worst, and you’ll catch most problems early enough to turn them around.
Worth bookmarking this one. A five-minute weekly check, using the routine above, catches most pest problems before they spread to the rest of your collection, and it’s a lot faster than troubleshooting after the fact. And if this turns out not to be a pest after all, the linked guides above on root rot, sunburn, cold damage, and overwatering versus underwatering will get you to the right answer next.