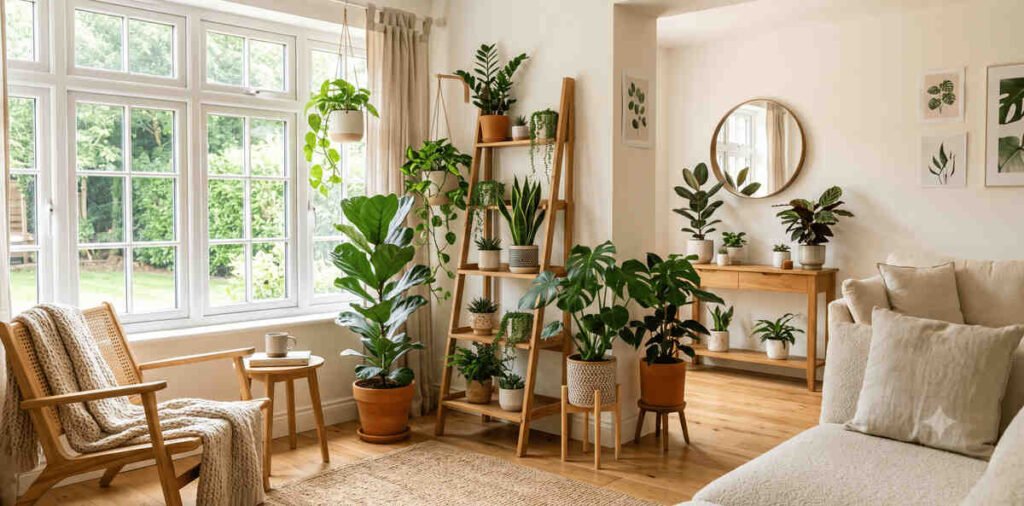
Good indoor plant care means the right plant, right light, proper watering, and drainage. Get these basics right and almost any houseplant will thrive.
Table of Contents
Why Most Beginners Fail at Indoor Plant Care
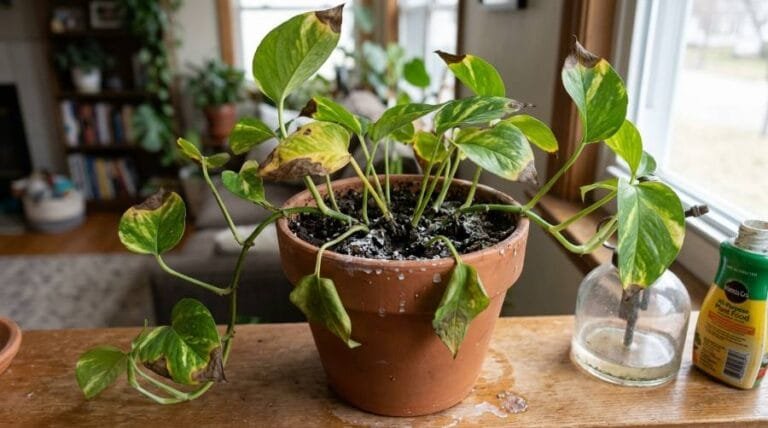
Here’s something that surprises almost everyone starting: overwatering kills far more houseplants than underwatering ever does. Here’s how to tell if your plant’s yellow leaves are from overwatering or underwatering. In fact, it’s counterintuitive. If a plant looks sad, the instinct is to give it more water. However, soggy roots can’t breathe, and a plant sitting in wet soil for days will rot from the roots up long before it shows any obvious warning signs on the leaves.
Indoor Plant Care Mistakes:
The Three Most Common Beginner Errors
- First, overwatering out of guilt. Sometimes called “guilt-watering”, walking past a plant, feeling bad that it hasn’t been touched in a few days, and watering it out of habit rather than actual need. Consequently, this kills more pothos and snake plants than bad luck ever will.
- Second, watering on a fixed schedule instead of checking the soil first. Every plant, room, and season is different. Yet, a rigid water every Sunday habit ignores what the plant is actually telling you.
- Finally, choosing a plant based on looks instead of light. A fiddle leaf fig looks stunning in photos. However, in a dim apartment corner, it will drop leaves within weeks. This isn’t a failure of effort rather, it’s a mismatch between the plant and the environment, and it’s completely avoidable.
The rest of this guide focuses on fixing all three problems, starting with picking a plant that fits your actual space. Root rot: the #1 beginner mistake. Read this to understand root rot.
Choosing the Right Plant: Indoor Plant Care for Your Space
Start With Your Light, Not With Looks
Before falling for a plant on Instagram, figure out what light your room actually gets. It takes thirty seconds.
The window direction test (Northern Hemisphere):
- South-facing windows — the most consistent, strongest light throughout the day, good for almost anything, including plants that want bright light.
- East-facing windows — gentle morning sun, ideal for plants that like bright but indirect light.
- West-facing windows — strong, hot afternoon sun, great light, but can scorch delicate leaves if the plant sits too close to the glass.
- North-facing windows — the softest, weakest light, this is where low-light-tolerant plants belong.
Not sure which direction your windows face? A compass app on your phone will tell you in seconds.
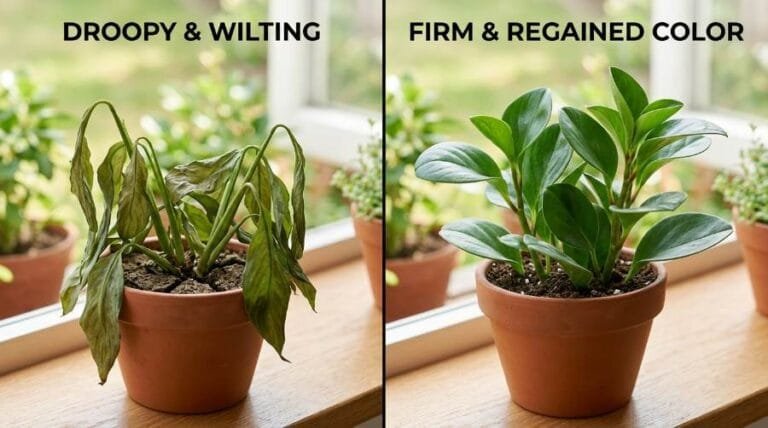
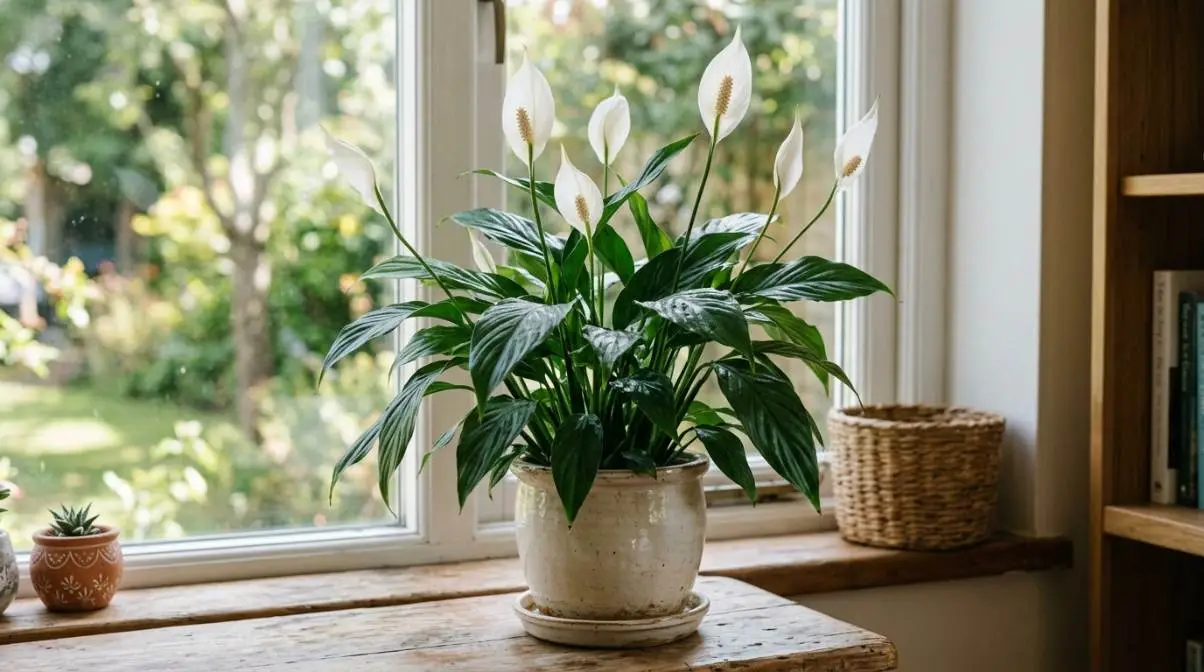
My first houseplant was a peace lily, bought mostly because it looked good on the kitchen counter in the store. Within two weeks, it looked terrible, leaves drooping so badly it looked almost dead. My first instinct was to water it again, thinking it was thirsty. Turns out that was exactly right, but for the wrong reason. A peace lily droops dramatically the moment it needs water, and just as dramatically perks back up within a few hours of getting it. It wasn’t a mystery illness. It was the plant’s own built-in signal. That one experience taught me more about reading plants than any care guide. Read this to know how much light is needed for plants.
Indoor Plant Care: Beginner Plant Comparison
| Plant | Light Needs | Watering Frequency | Pet Safe? | Why Beginners Love It |
| Pothos | Low to bright indirect | Every 1–2 weeks | No | Nearly impossible to kill; droops slightly when thirsty |
| Snake Plant | Low to bright indirect | Every 2–4 weeks | No | Thrives on neglect; stores water in thick leaves |
| Spider Plant | Bright indirect | Weekly | Yes | Fast grower, forgiving, produces “babies” to propagate |
| ZZ Plant | Low to medium indirect | Every 2–3 weeks | No | Waxy leaves store water; survives office lighting |
| Peace Lily | Medium to bright indirect | Weekly | No | Droops dramatically when thirsty, perks up right after watering |
| Philodendron | Medium to bright indirect | Every 1–2 weeks | No | Fast, trailing growth; tolerant of missed waterings |
| Chinese Money Plant | Bright indirect | Every 1–2 weeks | Yes | Compact, quirky round leaves, easy to propagate |
| Cast Iron Plant | Low light | Every 2–3 weeks | Yes | Genuinely thrives in neglect and dim corners |
If You Have Pets
This matters more than most beginner guides admit, and it deserves a direct answer instead of a vague warning.
Safe around cats and dogs:
- Spider Plant
- Calathea
- Boston Fern
- Chinese Money Plant
- Cast Iron Plant
Toxic if chewed:
- Pothos
- Peace Lily
- Philodendron
- Most Snake Plants
The ASPCA maintains a full searchable database of toxic and non-toxic plants, worth bookmarking if you share your home with a curious cat or a puppy that chews everything.
Plants to Hold Off On
Some plants are simply harder to keep happy, and there’s no shame in waiting:
- Fiddle Leaf Fig — picky about light consistency and hates being moved
- Calathea — wants humidity levels most homes don’t naturally have
- Orchids — bloom on their own schedule and confuse even experienced growers
Start with something forgiving. Build confidence first.
Light and Temperature: Setting Up the Right Indoor Plant Care Environment
The Hand-Shadow Test
A simple way to judge light intensity without any equipment:
- Hold your hand about a foot above the soil where the plant would sit.
- Check the soil during the brightest part of the day.
- Watch the shadow it casts:
- A sharp, defined shadow means bright light.
- A soft, blurry shadow means medium indirect light.
- Barely any shadow means low light.
This takes ten seconds and tells you more than most light meter apps.
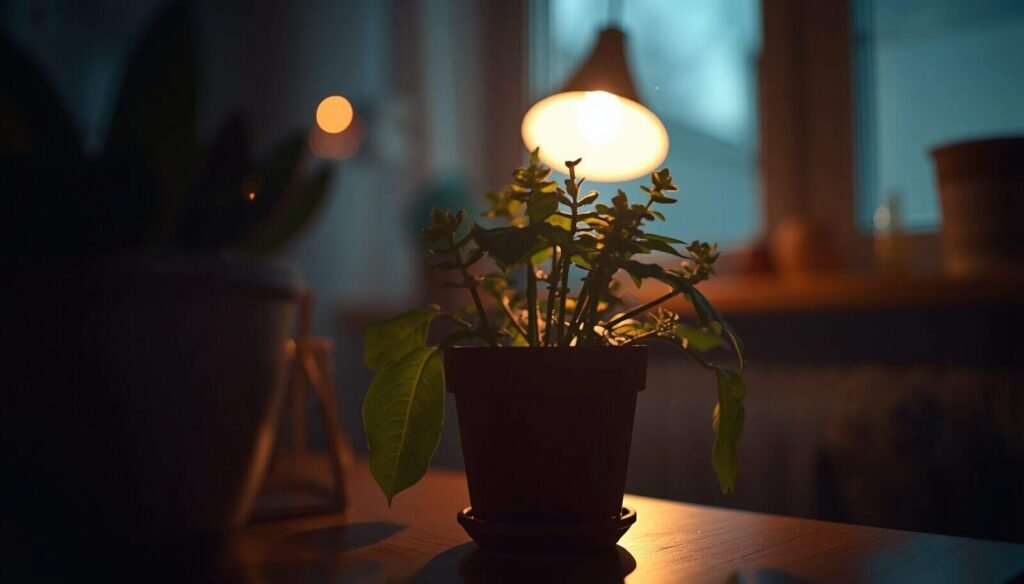
Direct Sun vs. Bright Indirect vs. Low Light
- Direct sun — hits the leaves without anything filtering it, like a plant sitting right on a south-facing windowsill with nothing between it and the glass
- Bright indirect light — the room is bright, but the sun’s rays aren’t landing straight on the leaves, such as a few feet back from that same window, or behind a sheer curtain
- Low light — the room is usable without turning on a lamp during the day, but no direct sun reaches the plant at all
Indoor Plant Care: Warning Signs to Know
- Too much direct sun shows up as brown, crispy patches — this is scorching, not underwatering, and it’s a common misdiagnosis.
- Too little light shows up as pale leaves, slow growth, and stems that stretch awkwardly toward the nearest light source.
Light is one of the biggest factors that determines whether an indoor plant thrives or struggles. If you want to learn the right amount of light for indoor plants, read this article. Instead of guessing if a room is “bright enough,” you can measure the actual light reaching your plants. Learn how to measure light for indoor plants and understand foot-candle values in our detailed guide.
Temperature
- Most common houseplants are comfortable between 65°F and 75°F (18°C to 24°C).
- Staying above 50°F (10°C) matters more than hitting an exact number; most tropical houseplants suffer real damage below that. Learn about plant sunburn recovery in this guide.
- in this article.
- Temperature swings cause more stress than a slightly cool but stable room. Watch for:
- A windowsill that gets a blast of cold air every time a door opens
- A spot perched right above a heating vent
Temperature is another important part of indoor plant care. Most houseplants prefer stable temperatures, but their ideal daytime and nighttime ranges can vary by species. For specific temperature ranges and tips for protecting plants from cold and heat, see our guide to Ideal Temperature for Houseplants (Day and Night Ranges)
Rotate Your Plants
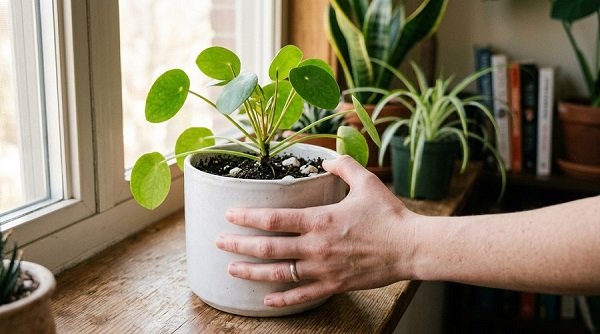
Plants grow toward their light source. Left in the same position for months, they’ll lean and grow lopsided.
- Give the pot a quarter-turn every couple of weeks.
- This keeps growth even on all sides.
- The difference becomes noticeable within a few months.
Watering: The System, Not Just the Rule
Check Before You Water
- Skip the calendar.
- Check the soil by putting your finger in up to your second knuckle.
- If it’s still moist, wait.
- If it’s dry at that depth, water.
This one habit prevents more overwatering deaths than any other single piece of advice in this guide to watering. For anyone who wants more certainty, a cheap soil moisture meter (usually under $10) removes the guesswork entirely. Read the guide to know why is my houseplants dying.
How to Actually Water
Watering “a little bit often” is one of the most common beginner habits, and one of the least effective. It wets only the top layer of soil and encourages roots to stay shallow, close to the surface.
Instead, follow this deep-watering method:
- Water slowly and thoroughly until it runs out of the drainage holes at the bottom. Learn about the best long sprout watering cans from this guide.
- Let it drain completely.
- Empty the drip tray or saucer; standing water here can cause root rot, even in a well-draining pot.
This encourages roots to grow downward and makes the whole plant more resilient between waterings.
If you want to know how to water correctly, see this guide: How to Water Plants Correctly: Methods That Actually Work
Overwatering vs. Underwatering: How to Tell the Difference
| Sign | Overwatering | Underwatering |
| Leaf color | Yellowing, often starting at the base | Leaves turn brown at the tips or edges |
| Leaf texture | Soft, mushy, sometimes translucent | Crispy, dry, curling inward |
| Soil condition | Wet or soggy, may smell musty | Dry, pulling away from the pot’s edges |
| Extra clues | Small black gnats flying near the soil | Soil shrinks visibly from the pot walls |
| Growth pattern | Sudden droop despite wet soil | Slow, stunted growth |
Quick fixes:
- Soil wet + leaves yellowing → ease off watering completely and let it dry out
- Soil bone-dry + leaves crispy → water thoroughly and check more often going forward
If your plant’s leaves are browning or growth has suddenly stalled, it might not be a watering issue at all; it could be a sign of one of these common fertilizer mistakes.
Does This Change With the Seasons?
Yes, significantly enough that it gets its own full section later in this guide. For now, the short version: most plants drink noticeably less in fall and winter. Watering on the same schedule year-round is one of the most common ways beginners accidentally overwater a plant that’s simply resting.
Soil and Pots: Getting the Foundation Right
Why Drainage Holes Are Non-Negotiable in Indoor Plant Care
A pot without drainage holes traps excess water at the bottom, invisible from the top. Roots sitting in that trapped water eventually rot, and by the time it’s visible in the leaves, the damage is often already done below the soil line.
- If you fall in love with a pot that has no hole, use it as a decorative outer sleeve.
- Keep the plant in its plastic nursery pot inside it.
Reading a Potting Mix Bag
Not all “potting soil” is the same, and the label tells you more than you’d think:
- Perlite or pumice (small white or gray specks): Right amount of perlite improves drainage and airflow around roots. Learn about perlite safety tips in this guide.
- Bark or coco coir: adds structure and helps the mix drain rather than compact
- Peat moss: retains moisture, useful in smaller amounts for plants that like consistent dampness
A “well-draining” houseplant mix should feel light and chunky, not dense like garden soil straight from a bag meant for outdoor beds. Choosing the right soil is critical. See our full guide to the best potting soils for indoor plants
Aroids like Monstera, Philodendron, and Pothos: a chunkier mix with orchid bark and perlite mixed in, see our chunky aroid mix recipe
Healthy potting mix supports roots the same way healthy garden soil does. Understanding the difference between synthetic and organic fertilizers helps you avoid depleting the microbial life in your pots over time. See the full breakdown here. also read perlite dust inhalation risks in this guide.
Pot Material Actually Matters
This gets skipped in most beginner guides, but it’s genuinely useful:
- Terracotta pots — porous, wicks moisture out through the sides; great if you tend to overwater, since the soil dries faster.
- Plastic or glazed ceramic pots — hold moisture longer, better suited to anyone who tends to forget waterings, or plants that prefer consistent dampness.
Once you’ve chosen the right plant and soil, picking the right pot is the final piece. Our Guide to choosing the best ceramic pots for indoor plants with drainage and glaze tips covers drainage, glaze types, and what to look for so your plant doesn’t suffocate in a pretty pot. If you want to match a perfect pot, then follow the guideline: Best Self-Watering Pots (2026): Top Picks Tested and Reviewed.
Self-watering pots solve the ‘I forget to water’ problem, but the right material and size still matter for long-term success. Get the full beginner pot strategy in Best Indoor Plant Pots for Beginners in 2026
Repotting Basics for Indoor Plant Care
Signs it’s time to repot:
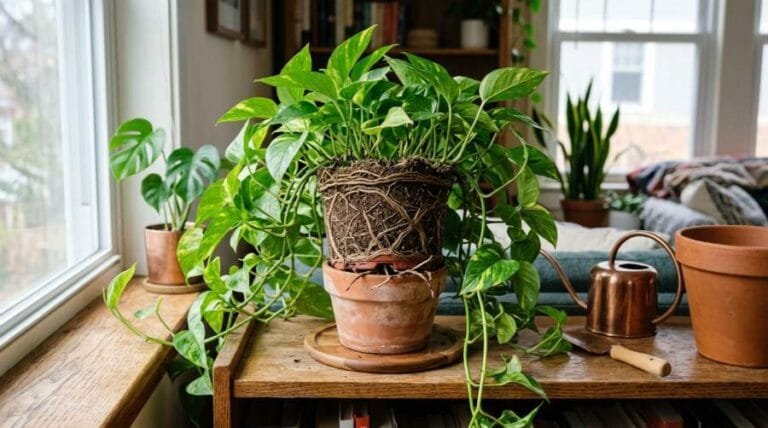
- Roots growing around the inside of the pot or coming out through the drainage holes.
- The water runs through the pot instead of soaking into the soil.
- Soil drying out unusually fast, sometimes within a day or two.
- Growth has stalled or slowed noticeably.
- The pot feels top-heavy and tips over easily.
For most beginner-friendly plants, this works out to roughly every 12 to 18 months — but let the signs guide the timing, not the calendar.
Sizing up correctly: Go up only 1 to 2 inches in diameter from the current pot. A common mistake is jumping into a much bigger pot, “so it won’t need repotting again soon.” That extra soil holds far more water than the roots can use, and it becomes a root rot risk.
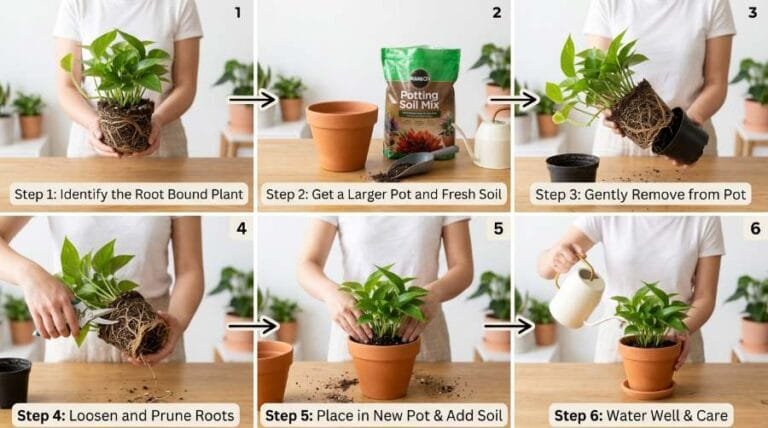
How to repot, step by step:
- Gently loosen the plant from its current pot, easing the root ball out rather than pulling by the stem.
- Tease apart any roots that are tightly circling the bottom.
- Add a layer of fresh potting mix to the base of the new pot. Learn about the best perlite potting mix from this article.
- Place the plant in the center of the pot and fill the space around it with soil.
- Water thoroughly right after repotting.
A few droopy days afterward are completely normal; it’s mild transplant shock, and most plants bounce back within a week. Root-bound is one of the most common reasons houseplants need repotting, but it’s not the only one. To learn more about root-bound, follow: What Does Root Bound Mean? Signs, Causes, and How to Fix It
Repot your plant in spring or early summer because it grows faster and recovers more easily during this time. Want to learn more about repotting houseplants? Check out this guide: How to Repot a Houseplant Without Killing It
Pruning and Grooming for Indoor Plant Care: Keeping Plants Healthy, Not Just Alive
This is one of the most overlooked parts of houseplant care, and it’s the difference between a plant that survives and one that actually looks good over time.
Why Bother Pruning a Houseplant?
Pruning isn’t just about tidiness:
- It redirects the plant’s energy toward healthy new leaves instead of wasting it on parts that won’t recover.
- It limits how far pests or fungal issues can spread if they take hold on one section.
Pinching for Fuller Growth
Plants like pothos and philodendron tend to grow long and stringy if left alone.
- Find the very tip of a growing stem.
- Pinch it off just above a leaf node.
- The plant branches out from that point instead of just growing longer.
Over a few months, this turns a single sparse vine into a much fuller, bushier plant.
Removing Dead or Damaged Leaves
- Use clean, sharp scissors or small pruning shears rather than pulling leaves off by hand.
- Pulling can tear the stem and create an open wound that’s more vulnerable to disease.
- A clean cut close to the base heals faster and looks tidier.
Trimming Leggy Growth
If a plant has been stretching toward a light source for a while, it often ends up with long, bare stems and leaves clustered only at the very end.
- Trim it back, even by a few inches.
- This encourages fuller regrowth closer to the base, especially once the light situation is corrected.
Indoor Plant Care: The Beginner Rule of Thumb
- Prune when you notice actual damage.
- Prune lightly for shape if a plant is getting unruly.
- Never remove more than about 20 to 25 percent of a plant at once, anything more can stress it significantly, even if it looks like it needs a bigger trim.
Humidity and Feeding
Why Dry Air Causes Brown Tips
Simple Fixes That Actually Work
Many popular houseplants, including pothos, philodendron, and calathea, originate from tropical regions where humidity naturally runs high. Indoor heating in fall and winter can drop household humidity dramatically, and the first sign is usually brown, crispy tips on otherwise healthy-looking leaves. How to Increase Humidity for Indoor Plants (10 Easy Methods) follow the guideline.
If you want to learn more about fertilizing time, follow The Best Time of Year to Fertilize Indoor Plants.
- Group plants together. They naturally raise humidity around each other as they release moisture through their leaves. Know which are humidity-loving plants from this article.
- Use a pebble tray. A shallow tray of water with pebbles underneath the pot (not touching the water directly) raises humidity right around the plant as it evaporates.
- Try bathroom placement. If there’s enough light, bathrooms often have naturally higher humidity from showers. Learn about plants that love humidity best for bathroom and kitchen.
- Add a small humidifier. This gives the most consistent results, especially for humidity-loving plants during winter. Learn details about the humidity guide: Best Humidifiers for Houseplants
Learn details about the fertilizer guide: How to Fertilize Indoor Plants: A Beginner’s Step-by-Step Guide
Want to learn how to increase humidity without a humidifier? Check out this guide: How to Increase Humidity in a Room Without a Humidifier
Fertilizing Without Overdoing It
New plant owners often assume feeding right away helps a plant settle in. It doesn’t:
- Most nursery plants come pre-fed with slow-release fertilizer and don’t need anything for the first couple of months.
- Once that period passes, feed during the active growing season (roughly spring through summer) using a balanced, diluted liquid houseplant fertilizer.
- Follow the dilution instructions on the label rather than eyeballing it.
- Skip fertilizing entirely in fall and winter; a dormant plant can’t use the extra nutrients, and feeding it during this time can actually damage the roots.
Learn how to fertilize correctly from the guide: How to Fertilize Indoor Plants the Right Way: The Foolproof Method That Prevents Root Burn.
Seasonal Adjustments in Indoor Plant Care Through the Year
This is the section most beginner guides skip entirely, and it’s often the missing piece that explains why a plant that thrived all summer suddenly struggles by December.
Spring and Summer
- This is the plant’s active growing season.
- Watering needs typically increase as the soil dries out faster in warmer temperatures.
- It’s the best window for repotting and fertilizing, since the plant has the energy to recover quickly from both.
Learn about summer heat stress in houseplants from this article.
Once you’ve got the basics down, a few situations call for extra attention:”
Fall and Winter
- Growth slows down dramatically, sometimes stopping almost entirely.
- Watering needs to be cut back significantly, this is the single most common time beginners accidentally overwater, because they keep watering on the same schedule out of habit, even as the plant’s actual needs have dropped.
- Fertilizing should pause completely.
- Indoor heating dries out the air, and drafts from doors or single-pane windows can stress plants that were perfectly happy a month earlier.
Learn about cold damage
Learn about cold damage to houseplants from this guide. Also learn how to protect plants from winter cold.
Light Shifts With the Seasons Too
A window that provided bright indirect light in July can become a low-light spot by December, simply because the sun sits lower in the sky and the days are shorter.
- Watch for a plant that starts stretching or losing color as fall progresses.
- Move it a few feet closer to the window, or to a different window entirely, to get through winter well.
Indoor Plant Care: Quick Seasonal Reference
| Season | Watering | Fertilizing | Light Adjustment | Repotting |
| Spring | Increase as soil dries faster | Resume, feed regularly | Usually stable | Best window to repot |
| Summer | Highest frequency of the year | Continue feeding | Watch for scorch near windows | Fine to repot if needed |
| Fall | Begin reducing frequency | Taper off, then stop | Move closer to windows as days shorten | Avoid unless urgent |
| Winter | Lowest frequency of the year | Pause completely | May need brighter spot due to weaker sun | Avoid |
Troubleshooting Guide: What’s Wrong With My Plant? An Indoor Plant Care Checklist
| Symptom | Likely Cause |
| Yellow leaves | Overwatering, or natural shedding of older leaves as the plant grows |
| Brown, crispy tips or edges | Low humidity or underwatering |
| Leggy, stretched-out growth | Not enough light |
| Drooping despite moist soil | Root rot, or shock from a recent move or repot |
| Small black flies near the soil | Fungus gnats, usually a sign of overwatering |
| No new growth for a while | Natural seasonal dormancy, or a light/nutrient issue if it persists outside winter |
| Sudden leaf drop in fall or winter | Often a normal seasonal adjustment, or stress from a nearby heater or draft — not necessarily disease |
For the upper plant problems and fixes read this guide.
The tiebreaker when symptoms overlap: Check the soil first.
- Wet soil + yellowing → points to overwatering
- Dry soil + browning → points to underwatering
That one check resolves most confusion. Overwatering vs. Underwatering know the differences in this guide.
Building a Simple Indoor Plant Care Routine
Rather than trying to remember everything at once, a light routine takes the guesswork out of week-to-week care:
- Weekly: Check the soil with the finger test. Water only if it’s dry at the second knuckle.
- Monthly: Wipe dust off the leaves with a damp cloth, dust blocks light absorption more than people realize, and clean leaves photosynthesize noticeably better.
- Spring through summer: Fertilize on the schedule the product recommends. Rotate pots every couple of weeks for even growth.
- Fall and winter: Pause fertilizing. Reduce watering frequency. Check for drafts near windows or heating vents.
- As needed: Prune damaged leaves whenever spotted. Check for repotting signs every few months, especially after a growth spurt.
Tools That Make Beginner Indoor Plant Care Easier
A few inexpensive tools remove most of the guesswork for someone just starting:
- Soil moisture meter — takes the ambiguity out of the finger test
- Watering can with a narrow spout — makes it easier to water soil directly without splashing leaves.
- Small misting bottle: useful for humidity-loving plants between full waterings.
- Pot with a matching saucer: protects surfaces and makes drainage easy to manage.
- Clean, sharp pruning shears: for healthy cuts that heal properly.
- A digital hygrometer: for highly precious reading.
None of these are required to keep a plant alive, but they make the whole process noticeably less stressful for a first-time plant owner. Learn more about the best indoor gardening tool kits from this article.
Frequently Asked Questions
How often should I water indoor plants?
It depends on the plant, the season, and your home’s conditions, not a fixed number of days. Check the soil weekly with the finger test, and water only when it’s dry an inch or two down. Most common houseplants need water anywhere from once a week to once a month.
What’s the easiest indoor plant to keep alive?
Snake plants and ZZ plants are generally considered the most forgiving, tolerating low light and infrequent watering better than almost anything else sold as a houseplant.
Can indoor plants survive in a room with no windows?
Living plants need some light to photosynthesize, so a room with zero natural light will struggle to support most plants long-term unless supplemented with a grow light. A room with even minimal indirect natural light can support tough varieties like snake plants or ZZ plants.
Why do my plant’s leaves turn yellow?
Most often, it’s overwatering. It can also be a natural process older, lower leaves yellow and drop as the plant grows and redirects energy to new growth. Check the soil first before assuming something is wrong.
Are indoor plants safe for cats and dogs?
Some are; many aren’t. Spider plants, Calathea, and Boston ferns are generally considered pet-safe, while pothos, peace lilies, and philodendron are toxic if chewed. The ASPCA’s plant database is a reliable reference for checking any specific plant.
How do I know when to repot my plant?
Look for roots circling the pot or poking through drainage holes, water running straight through without soaking in, or the plant drying out much faster than usual. These signs matter more than any fixed timeline.
Do I need to prune my indoor plants?
It’s not mandatory for survival, but it keeps plants fuller, healthier, and more attractive over time by removing damaged growth and encouraging branching.
Should I water my plants less in winter?
Yes, for most common houseplants. Growth slows down significantly in fall and winter, and the soil stays moist longer as a result. Watering on the same summer schedule is one of the most common causes of winter overwatering.
Final Thoughts
Healthy houseplants aren’t the result of a perfect memory or a green thumb someone is born with. They come from paying attention:
- Checking the soil instead of the calendar.
- Matching the plant to the light that’s actually available.
- Adjusting a little as the seasons change.
Start with one or two forgiving plants from the list above. Learn how they behave. The confidence built from keeping those alive makes every plant after them easier.